
My journey into the world of baking, particularly with sourdough recipes, began like many others during a time when the world seemed to slow down. I remember the early days of the pandemic, feeling a strange mix of anxiety and a newfound desire to create something tangible, something that felt ancient and comforting. It started with a tiny jar on my counter, a bubbling concoction of flour and water that I lovingly named 'Bertha.' Bertha, my sourdough starter, was finicky at first. There were days of doubt, loaves that resembled doorstops more than artisanal bread, and the distinct smell of failure wafting through my kitchen. I poured over countless sourdough recipes, watched endless videos, and joined online communities, determined to crack the code. The learning curve was steep, but with every failed attempt, I learned something new – the subtle art of hydration, the perfect stretch and fold, the magic of cold proofing. The moment I pulled that first perfectly golden, crusted, open-crumbed loaf from my Dutch oven, I felt an almost primal sense of accomplishment. It was more than just bread; it was a testament to patience, persistence, and the incredible satisfaction of baking from scratch. This recipe is the culmination of all those trials and triumphs, designed to guide you through creating your own sourdough masterpiece, even if you’re just starting your journey with sourdough recipes.
Why This Sourdough Recipe is a Must-Try
Unmatched Flavor and Texture
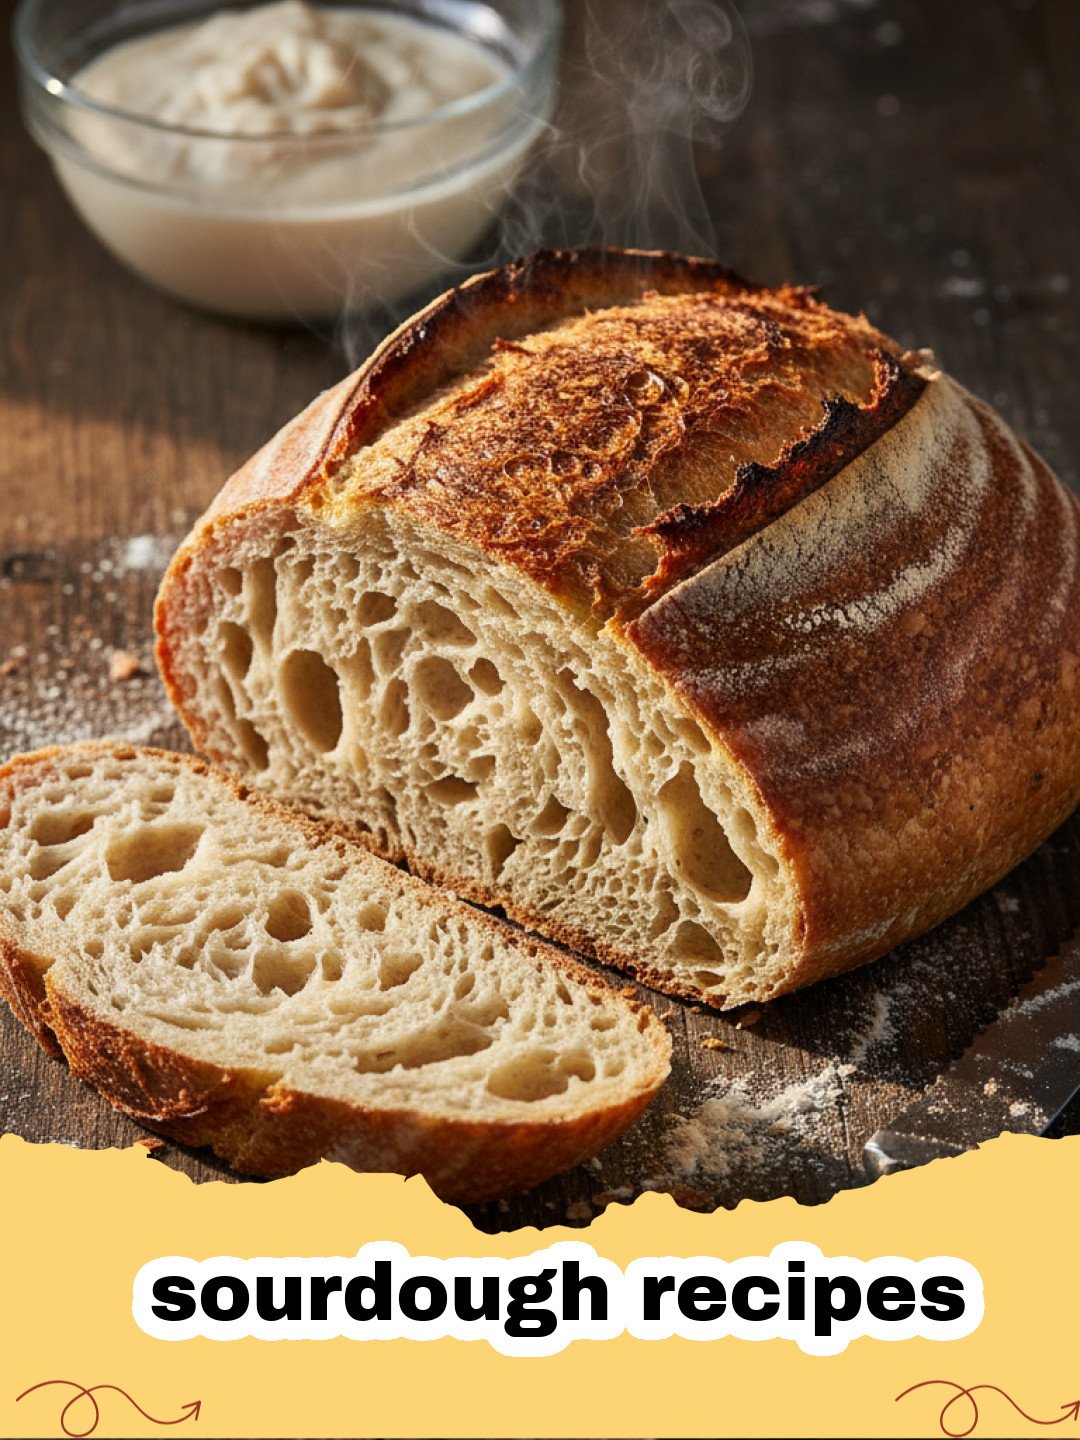
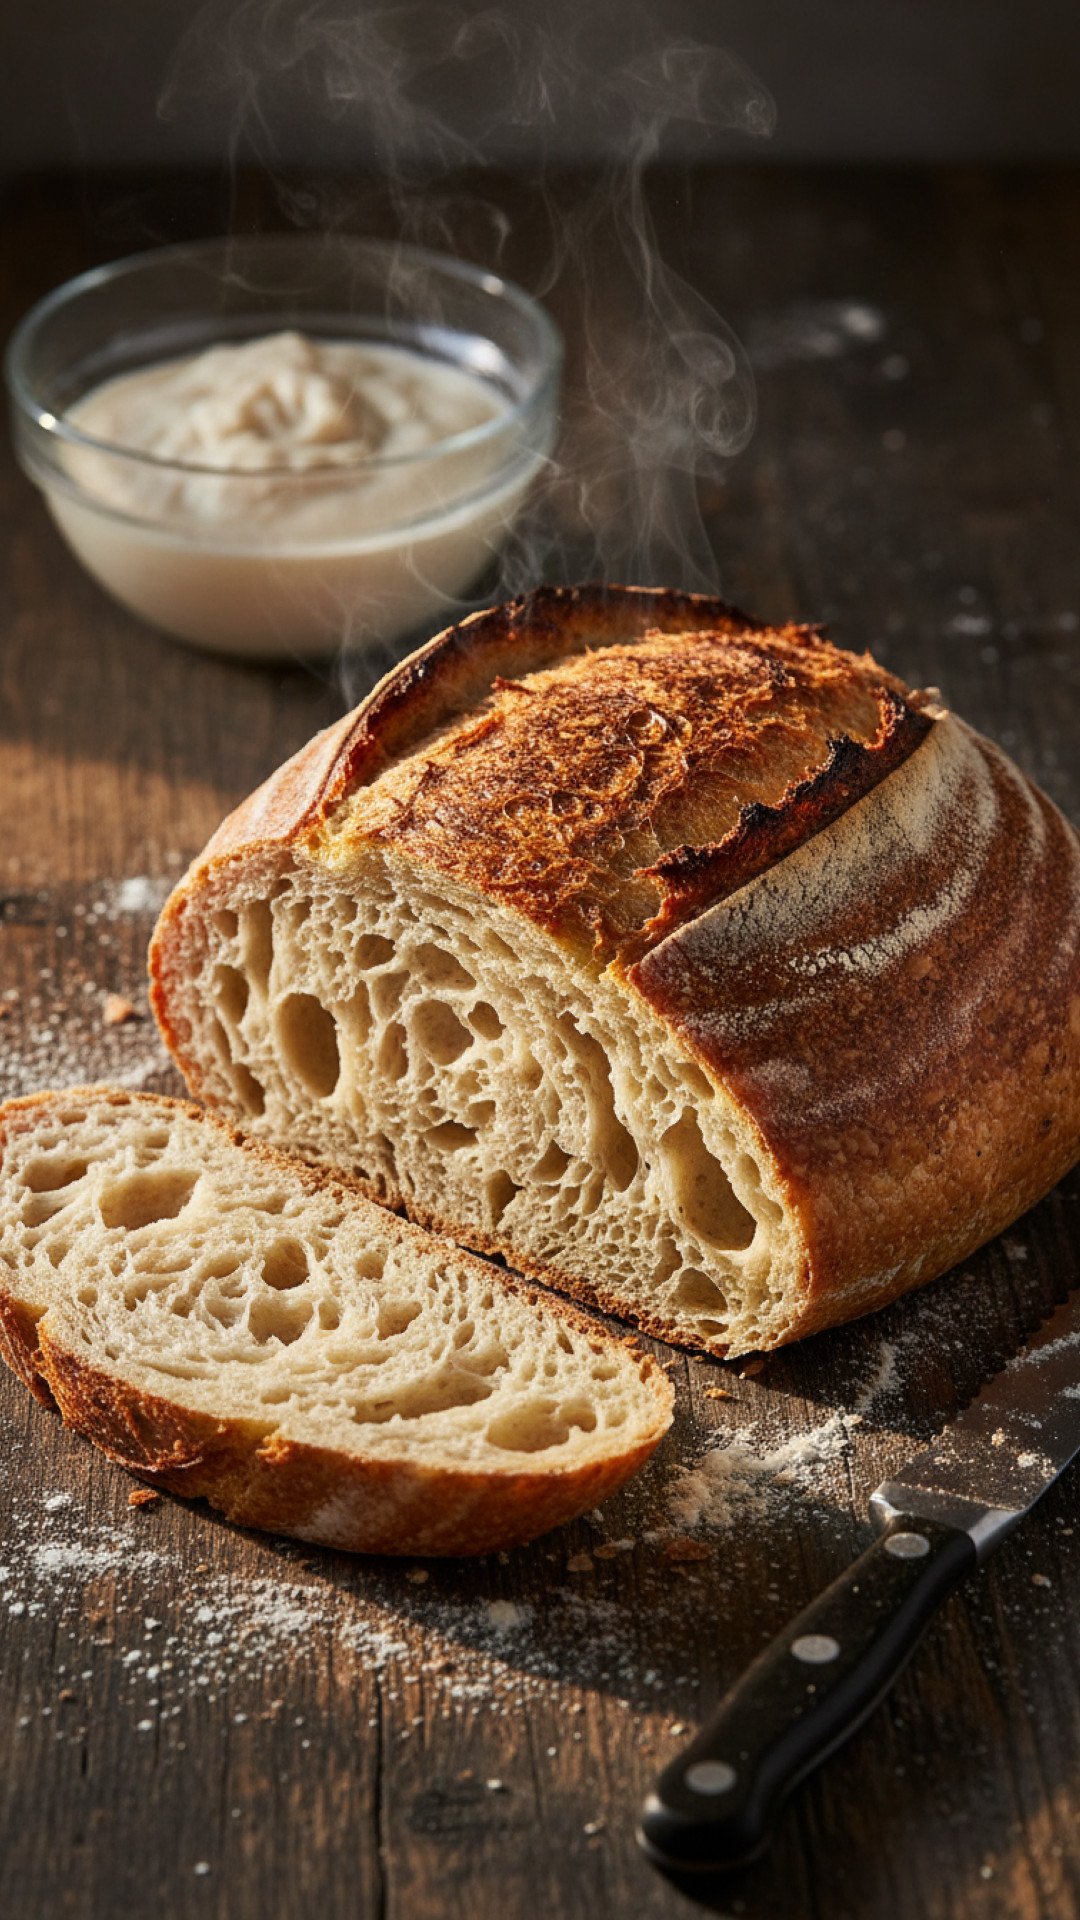
There's nothing quite like the tangy, complex flavor and the chewy, airy texture of a homemade sourdough loaf. This particular recipe emphasizes developing that deep, rustic taste and a beautiful open crumb that makes every bite a delight.
Therapeutic and Rewarding Process
Baking sourdough is more than just following steps; it's a meditative process. From feeding your starter to shaping the dough, each stage offers a unique satisfaction, culminating in the joy of pulling a perfect loaf from your oven. It’s one of those sourdough recipes that truly gives back.
Versatile and Healthy
Sourdough bread is incredibly versatile, perfect for sandwiches, toast, or alongside a hearty soup. Plus, the fermentation process makes it easier to digest and can improve nutrient availability compared to conventional bread.
Impress Your Friends and Family
Bringing a fresh, homemade sourdough loaf to the table is always a showstopper. Prepare to receive endless compliments and requests for more of your fantastic sourdough recipes!
Key Ingredient Notes
While the list of ingredients for this sourdough recipe is short, the quality and condition of each play a crucial role in the final outcome. Understanding them will elevate your sourdough baking.
Active Sourdough Starter (Levain)
This is the heart and soul of any good sourdough recipe. Your starter needs to be active and mature. An active starter will be bubbly, smell pleasantly yeasty and slightly sour, and will pass the float test (a small spoonful will float in water). Typically, you'll feed your starter 4-12 hours before you plan to mix your dough, ensuring it's at its peak activity. A weak starter means a weak rise, so don't skip this crucial step in your sourdough recipes.
High-Quality Bread Flour
Bread flour has a higher protein content than all-purpose flour, which means it can develop more gluten. Gluten is what gives sourdough its structure and elasticity, allowing it to trap gases and create those beautiful, airy pockets. While you can use all-purpose flour, bread flour will yield a superior crumb and a more robust loaf. Experimenting with different types of bread flour can also slightly alter the flavor and texture of your sourdough recipes.
Good Quality Salt
Salt is not just for flavor; it also plays a role in controlling fermentation and strengthening the gluten network. Avoid iodized salt, as it can sometimes inhibit yeast activity. Fine sea salt or kosher salt are excellent choices. Add salt after the autolyse phase to ensure it doesn't interfere with the initial hydration of the flour, which is a common tip for many sourdough recipes.
Step-by-Step Guide with Pro Tips
Mastering sourdough recipes takes practice, but with these detailed steps and pro tips, you'll be well on your way to baking beautiful loaves.
The Autolyse: Hydration is Key
The autolyse step is foundational for many sourdough recipes. It's where the magic of hydration begins, allowing the flour to fully absorb water and start developing gluten naturally before any other ingredients interfere.
- Step 1: In a large mixing bowl, combine the bread flour and warm water (100°F-105°F). Mix until just combined and no dry flour remains. The dough will be shaggy.
- Step 2: Cover the bowl with a damp cloth or plastic wrap and let it rest for 30 minutes to 1 hour at room temperature. This is the autolyse phase, which helps hydrate the flour and start gluten development.
Adding the Starter and Salt: Bringing the Life In
Once the autolyse is complete, it's time to introduce your active starter and the essential salt. These elements kick off the fermentation process and provide flavor.
- Step 3: Add the active sourdough starter directly to the dough. Using wet hands, dimple the starter into the dough until fully incorporated.
- Step 4: Sprinkle the salt over the dough. Fold the dough over on itself several times, squeezing gently to distribute the salt evenly. The dough will feel sticky at this stage.
- Step 5: Cover and let rest for 30 minutes. This begins the bulk fermentation for our sourdough recipes.
Bulk Fermentation and Stretch & Folds: Building Strength
This phase is critical for developing the dough's strength and elasticity, which translates to a beautiful crumb. You'll perform a series of 'stretch and folds'.
- Step 6: Perform the first set of stretch and folds. With wet hands, grab a portion of the dough from one side, stretch it upwards gently, and fold it over to the opposite side of the bowl. Rotate the bowl a quarter turn and repeat this process 3-4 more times until you've worked your way around the dough. The dough should start to feel smoother.
- Step 7: Cover and let rest for 30 minutes.
- Step 8: Repeat the stretch and fold process (Step 6) three more times, with 30-minute rest periods in between each set. After the fourth set, the dough should be significantly stronger, smoother, and more elastic. The total bulk fermentation time will be around 3-4 hours, depending on your room temperature and starter activity. Look for the dough to increase in volume by about 20-30%.
Pre-Shaping: Preparing for the Final Form
Pre-shaping helps to create tension in the dough, making the final shaping much easier and contributing to a good rise. This is a common technique in advanced sourdough recipes.
- Step 9: Gently tip the dough out onto a lightly floured surface. Using a bench scraper, gently shape the dough into a loose round or rectangle. Try to create some surface tension without tearing the dough.
- Step 10: Cover with a damp cloth and let rest for 20-30 minutes. This allows the gluten to relax.
Final Shaping: Creating Tension for a Perfect Loaf
The final shaping is where you create the structure that will hold your loaf's shape during baking.
- Step 11: Lightly flour a banneton (proofing basket) or a bowl lined with a floured tea towel.
- Step 12: Gently flip the dough over so the seam is facing up. Shape the dough into a tight boule (round) or batard (oval), creating significant surface tension. There are many techniques for shaping; choose one you are comfortable with. The goal is a taut skin.
- Step 13: Carefully place the shaped dough into the prepared banneton, seam-side up (if baking in a Dutch oven, this will become the top).
Cold Proofing: Developing Flavor and Structure
Cold proofing slows down fermentation, which allows for deeper flavor development and makes the dough easier to handle and score.
- Step 14: Cover the banneton with plastic wrap or place it inside a large plastic bag. Refrigerate for at least 12 hours, and up to 24 hours. This cold proofing is vital for the structure and flavor of many sourdough recipes. You can also store your finished sourdough in glass food storage containers to keep it fresh longer. If you’re looking for other ways to use your starter, check out our Divine Sourdough Discard Cinnamon Rolls!
Baking: The Grand Finale
Baking in a preheated Dutch oven creates the perfect steamy environment for an excellent oven spring and a crispy crust.
- Step 15: About 45-60 minutes before baking, preheat your oven to 475°F (245°C) with a Dutch oven inside. Make sure it's fully preheated.
- Step 16: Carefully remove the hot Dutch oven from the oven. Gently invert the cold dough from the banneton directly into the hot Dutch oven.
- Step 17: Using a sharp razor blade or lame, score the top of the dough. A single deep score is common, but feel free to get creative with patterns.
- Step 18: Cover the Dutch oven and bake for 20 minutes.
- Step 19: Remove the lid from the Dutch oven, reduce the oven temperature to 450°F (230°C), and continue to bake for another 20-25 minutes, or until the crust is deeply golden brown and the internal temperature reaches 200-210°F (93-99°C).
- Step 20: Carefully remove the loaf from the Dutch oven and place it on a wire rack to cool completely for at least 1-2 hours before slicing. Slicing too early will compromise the crumb.
Variations & Serving Suggestions
This basic sourdough recipe is a fantastic canvas for endless creativity. Once you've mastered the foundational loaf, you can begin to explore a myriad of other sourdough recipes.
Flavorful Add-ins
- Seeds: Incorporate 1/4 to 1/2 cup of toasted seeds like sesame, poppy, sunflower, or pumpkin during the first stretch and fold.
- Herbs and Garlic: Mix in 2-3 tablespoons of chopped fresh rosemary or dried oregano, and 1-2 cloves of minced garlic, for an aromatic loaf.
- Cheese: Add 1/2 to 1 cup of grated hard cheese like Parmesan or cheddar during the shaping phase for a savory treat.
- Olives and Sundried Tomatoes: For a Mediterranean twist, fold in 1/2 cup of chopped olives and 1/4 cup of sundried tomatoes.
Different Flours
Experiment with different flour blends for varying flavors and textures. Replace 10-20% of the bread flour with whole wheat, rye, or spelt flour. This will impact the dough's hydration and texture, so you might need to adjust the water slightly. Each variation creates uniquely delicious sourdough recipes.
Serving Suggestions
- Classic Toast: Perfect with butter, jam, avocado, or a fried egg.
- Sandwiches: The sturdy crust and open crumb make it ideal for hearty sandwiches.
- Crostini: Slice thinly, toast with olive oil, and top with bruschetta, goat cheese, or tapenade.
- With Meals: Serve alongside hearty stews, chili, or a comforting One-Pan Ground Beef & Veggie Skillet to soak up all the delicious juices. It’s also fantastic with any soup or salad.
Nutrition Information
Here’s an estimated nutritional breakdown for a single slice of this delicious sourdough loaf. Please note that these are estimates and can vary based on exact ingredients and portion sizes. Enjoying sourdough recipes can be part of a balanced diet.
| Nutrient | Amount Per Serving |
|---|---|
| Calories | 180 kcal |
| Carbohydrates | 35 g |
| Cholesterol | 0 mg |
| Total Fat | 1.5 g |
| Dietary Fiber | 2 g |
| Protein | 6 g |
| Saturated Fat | 0.2 g |
| Serving Size | 1 slice (approx. 50g) |
| Sodium | 320 mg |
| Sugar | 1 g |
| Trans Fat | 0 g |
| Unsaturated Fat | 1 g |
Conclusion
Baking your own sourdough bread is a truly magical experience, one that connects you to ancient traditions and offers immense satisfaction. From the first bubbling of your starter to the golden-brown crust of your finished loaf, every step is a testament to patience and craft. I hope this ultimate sourdough recipe guides you to creating your own beautiful loaves and brings the warmth and aroma of freshly baked bread into your home. Don't be afraid to experiment, to learn from each bake, and most importantly, to enjoy the process. Happy baking, and may your kitchen always be filled with the delightful scent of amazing sourdough recipes!
FAQs
How do I know my sourdough starter is active enough for these sourdough recipes?
An active sourdough starter will have doubled or tripled in size after being fed (typically within 4-12 hours, depending on ambient temperature), will be very bubbly, and will pass the float test. To perform the float test, drop a small spoonful of starter into a glass of water; if it floats, it's ready to use in your sourdough recipes.
What is the autolyse step and why is it important in sourdough recipes?
The autolyse is a resting period for the flour and water mixture, typically lasting 30 minutes to an hour. It allows the flour to fully hydrate and enzymes to naturally begin breaking down starches into sugars, which feeds the yeast and bacteria in your starter. This step is crucial for developing gluten without kneading, leading to a more extensible dough and a better crumb in your sourdough recipes.
Why is cold proofing recommended for sourdough bread?
Cold proofing, or retarding the dough in the refrigerator, slows down fermentation, allowing for a longer, slower development of flavor (creating that signature sourdough tang) and improving the dough's structure. It also makes the dough easier to handle and score, resulting in better oven spring and a more professional-looking loaf from your sourdough recipes.
How can I achieve a super crispy crust on my sourdough loaf?
A super crispy crust is achieved primarily by baking in a preheated Dutch oven. The Dutch oven traps steam released from the dough during the initial baking phase, which keeps the crust soft and pliable, allowing the loaf to expand (oven spring). Once the lid is removed, the dry heat finishes baking, creating that desirable crispy, golden-brown crust for all your sourdough recipes.

The Ultimate Sourdough Masterpiece Loaf
Unlock the ancient art of bread making with this comprehensive sourdough recipe. From a bubbly starter to a perfectly crusted, open-crumbed loaf, this guide will help you bake a truly artisanal sourdough bread at home. Experience the deep flavor and satisfying texture of homemade sourdough with detailed instructions and pro tips.
- Total Time: 1 hour 15 minutes (+ 12-24 hours cold proof + bulk fermentation)
- Yield: 1 large loaf (approx. 10-12 slices) 1x
Ingredients
100g active sourdough starter (fed and bubbly)
350g warm water (100°F-105°F)
500g strong bread flour (unbleached)
10g fine sea salt
Instructions
Step 1: In a large mixing bowl, combine the bread flour and warm water. Mix until just combined and no dry flour remains. The dough will be shaggy.
Step 2: Cover the bowl with a damp cloth or plastic wrap and let it rest for 30 minutes to 1 hour at room temperature. This is the autolyse phase.
Step 3: Add the active sourdough starter directly to the dough. Using wet hands, dimple the starter into the dough until fully incorporated.
Step 4: Sprinkle the salt over the dough. Fold the dough over on itself several times, squeezing gently to distribute the salt evenly.
Step 5: Cover and let rest for 30 minutes.
Step 6: Perform the first set of stretch and folds. With wet hands, grab a portion of the dough from one side, stretch it upwards gently, and fold it over to the opposite side of the bowl. Rotate the bowl a quarter turn and repeat this process 3-4 more times.
Step 7: Cover and let rest for 30 minutes.
Step 8: Repeat the stretch and fold process (Step 6) three more times, with 30-minute rest periods in between each set. The total bulk fermentation time will be around 3-4 hours, or until the dough increases in volume by about 20-30%.
Step 9: Gently tip the dough out onto a lightly floured surface. Using a bench scraper, gently shape the dough into a loose round or rectangle, creating some surface tension.
Step 10: Cover with a damp cloth and let rest for 20-30 minutes (bench rest).
Step 11: Lightly flour a banneton (proofing basket) or a bowl lined with a floured tea towel.
Step 12: Gently flip the dough over so the seam is facing up. Shape the dough into a tight boule (round) or batard (oval), creating significant surface tension. Place into the prepared banneton, seam-side up.
Step 13: Cover the banneton with plastic wrap or place it inside a large plastic bag. Refrigerate for at least 12 hours, and up to 24 hours (cold proof).
Step 14: About 45-60 minutes before baking, preheat your oven to 475°F (245°C) with a Dutch oven inside. Make sure it's fully preheated.
Step 15: Carefully remove the hot Dutch oven from the oven. Gently invert the cold dough from the banneton directly into the hot Dutch oven.
Step 16: Using a sharp razor blade or lame, score the top of the dough.
Step 17: Cover the Dutch oven and bake for 20 minutes.
Step 18: Remove the lid from the Dutch oven, reduce the oven temperature to 450°F (230°C), and continue to bake for another 20-25 minutes, or until the crust is deeply golden brown and the internal temperature reaches 200-210°F (93-99°C).
Step 19: Carefully remove the loaf from the Dutch oven and place it on a wire rack to cool completely for at least 1-2 hours before slicing.
Notes
The timing for bulk fermentation can vary significantly depending on the ambient temperature of your kitchen and the activity of your sourdough starter. Pay attention to the dough's feel and volume increase (20-30%) rather than strict timings. A well-maintained starter is key to successful sourdough recipes.
- Prep Time: 30 minutes
- Cook Time: 45 minutes
- Category: Desserts & Baking
- Cuisine: European
Nutrition
- Serving Size: 1 slice (approx. 50g)
- Calories: 180 kcal
- Sugar: 1 g
- Sodium: 320 mg
- Fat: 1.5 g
- Saturated Fat: 0.2 g
- Unsaturated Fat: 1 g
- Trans Fat: 0 g
- Carbohydrates: 35 g
- Fiber: 2 g
- Protein: 6 g
- Cholesterol: 0 mg
Leave a Reply