

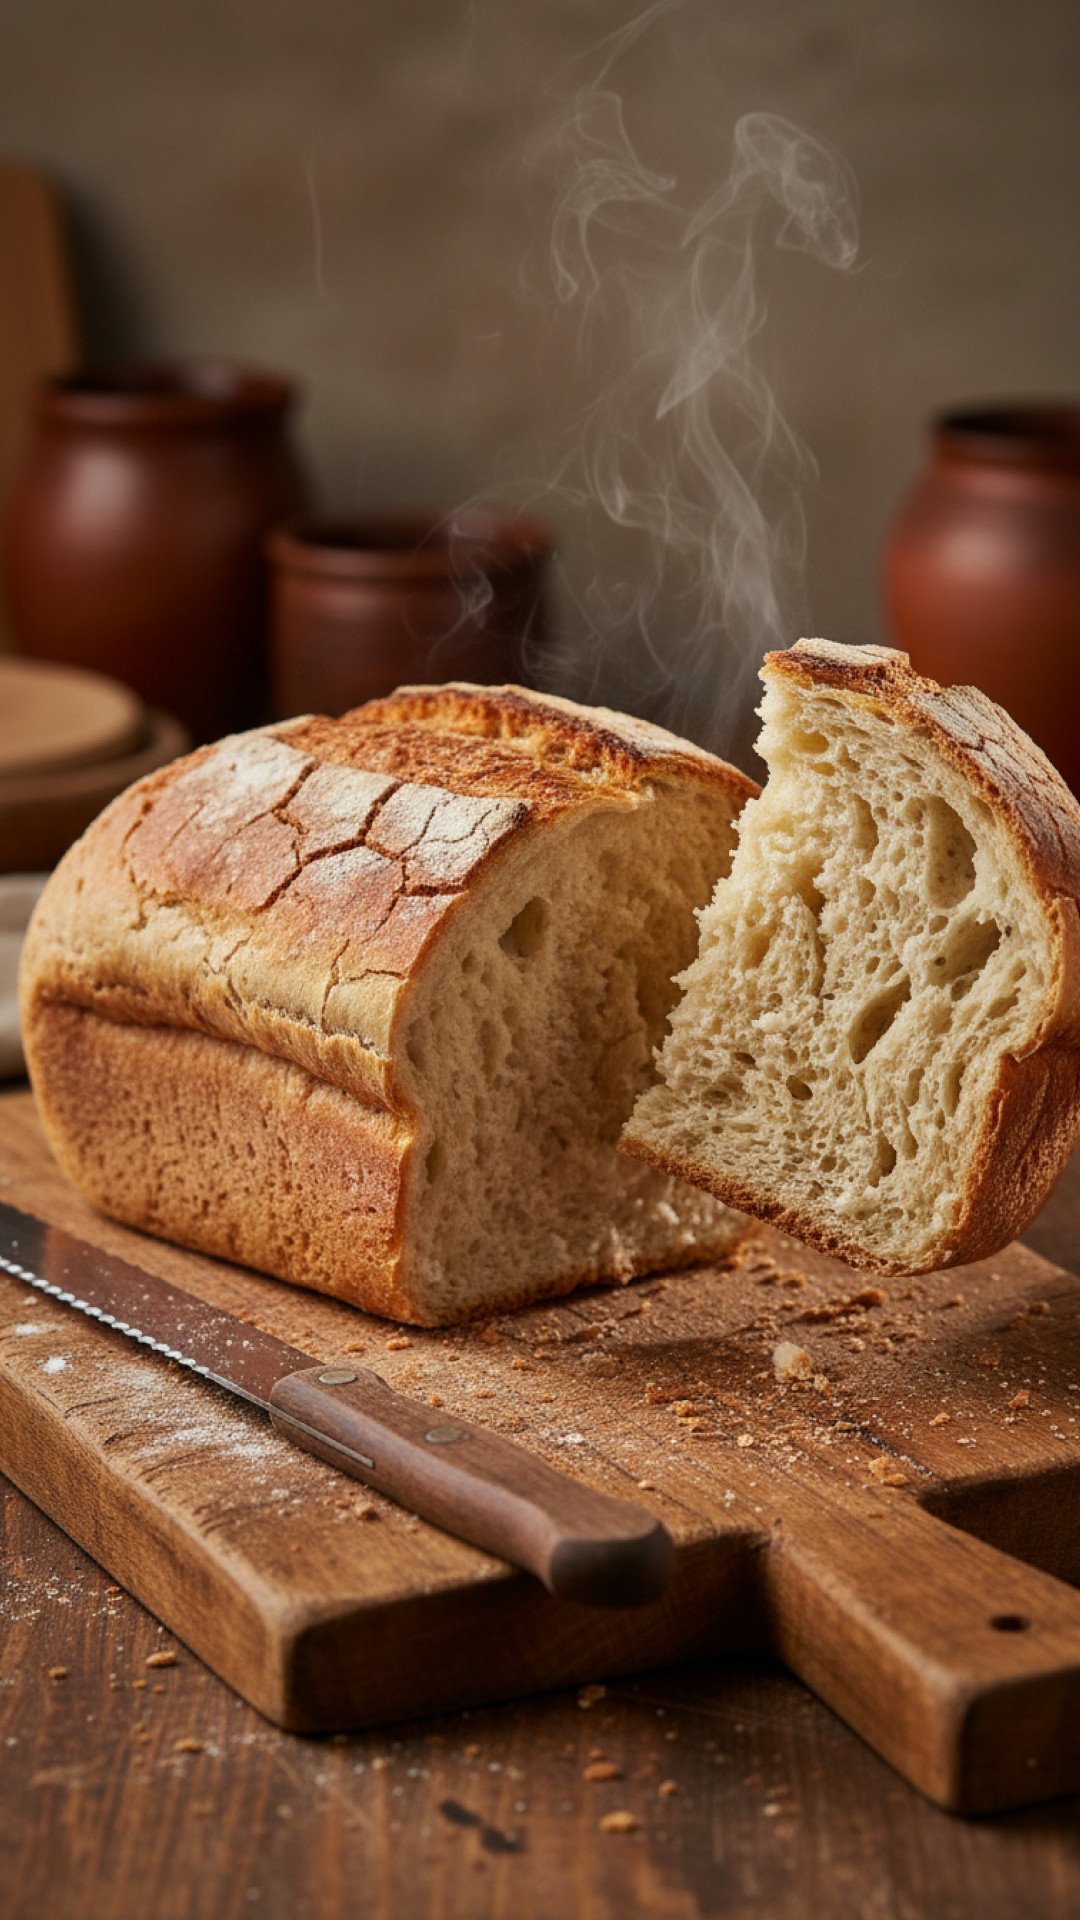
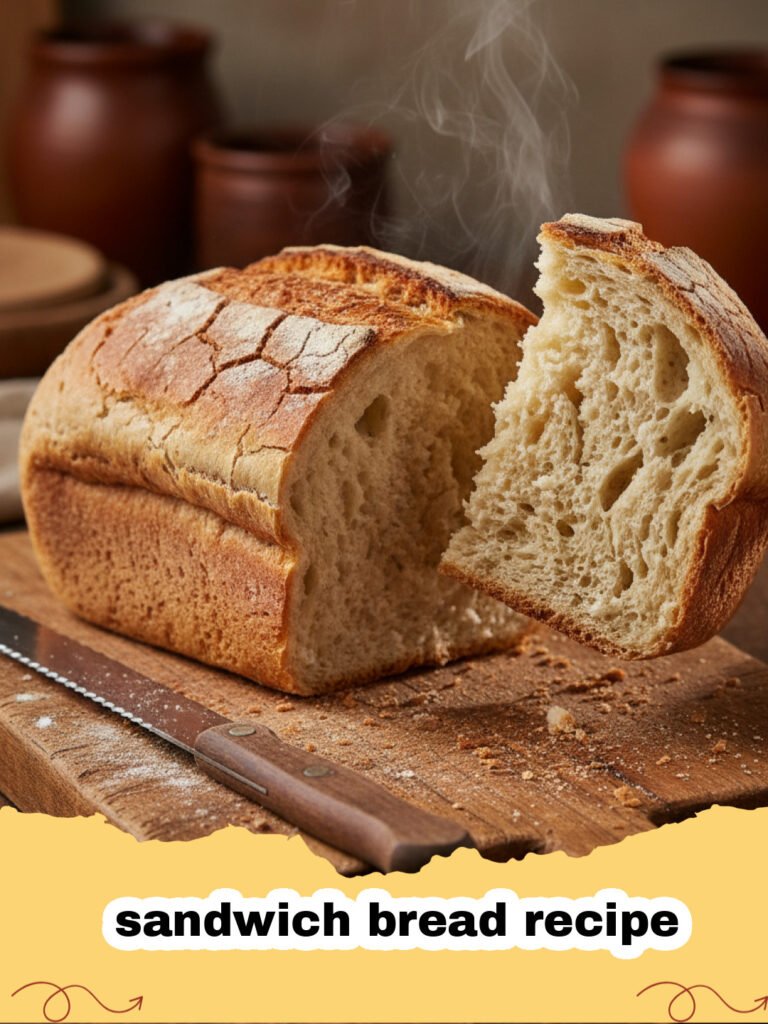
There’s something truly magical about the aroma of freshly baked bread wafting through your home. For years, I chased that elusive scent, trying every trick in the book, from store-bought mixes to overly complicated artisanal recipes. My journey with a classic sandwich bread recipe began rather unglamorously. I remember my first attempt at making bread from scratch for my kids' school lunches. I envisioned perfectly golden, soft slices, but what I pulled out of the oven was a dense, brick-like loaf that could’ve doubled as a doorstop! My children, bless their honest hearts, politely (or not-so-politely) opted for store-bought instead. It was a humbling experience, to say the least. But that failure only fueled my determination. I spent countless weekends experimenting, kneading, proofing, and adjusting. I poured over old cookbooks, watched countless baking videos, and even consulted a seasoned baker at my local farmers' market. Slowly but surely, I started to understand the nuances of yeast, the texture of properly kneaded dough, and the importance of a good rise. This journey wasn't just about baking; it was about persistence, learning from mistakes, and the joy of creating something wholesome with my own hands. The moment I finally achieved that perfect, fluffy, golden-brown loaf – the kind that springs back when you touch it, the kind that makes the best grilled cheese or PB&J – was a triumph. My kids now beg for my homemade bread, and that, my friends, is the greatest reward. This sandwich bread recipe isn't just a collection of ingredients; it's a testament to patience and a love for good, simple food.
Why This Sandwich Bread Recipe is a Must-Try
- Unbeatable Freshness and Flavor: Nothing compares to the taste and aroma of warm, homemade bread. This sandwich bread recipe delivers a soft crumb, a golden crust, and a flavor profile far superior to anything you'll find in a grocery store aisle.
- Perfect Texture Every Time: Forget dense, dry bread! This recipe is specifically designed to produce a light, fluffy loaf that's ideal for slicing, toasting, and holding all your favorite sandwich fillings, from a simple slice of cheese to a hearty serving of homemade mac and cheese.
- Economical and Wholesome: Making your own bread is significantly cheaper than buying it, and you control every ingredient. No strange preservatives or additives here, just pure, wholesome goodness in every slice of this amazing sandwich bread recipe.
- A Rewarding Baking Experience: There’s immense satisfaction in creating something delicious from scratch. The process of kneading and watching the dough rise is incredibly therapeutic, and the end result – a perfect loaf of sandwich bread – is a true culinary achievement.
Key Ingredient Notes for Your Sandwich Bread Recipe
Understanding your ingredients is key to mastering any baking project, especially a reliable sandwich bread recipe. Here are a few notes on the stars of this show:
All-Purpose Flour
While some bread recipes call for bread flour, which has a higher protein content, I find that good quality all-purpose flour works beautifully for a soft, pliable sandwich bread. The key is in the kneading. Don’t be tempted to add too much extra flour during the kneading process, as this can lead to a dry, dense loaf. The dough should be slightly sticky at first, becoming smooth and elastic as you work it. The gluten in the flour is what gives the bread its structure, and thorough kneading helps to develop it, resulting in that wonderfully chewy texture that defines a great sandwich bread recipe.
Active Dry Yeast
Yeast is the living organism responsible for making your bread rise, creating those lovely air pockets. For this sandwich bread recipe, we’re using active dry yeast, which needs to be activated in warm liquid (water or milk) before being added to the dry ingredients. The ideal temperature for activating yeast is between 105°F and 115°F (40°C and 46°C). If the liquid is too cold, the yeast won't activate; too hot, and you'll kill it. A little sugar helps to feed the yeast and get it bubbling, proving it’s alive and ready to work its magic. Always check the expiration date on your yeast – old yeast is a common culprit for failed bread!
Milk and Butter
Incorporating milk and butter into this sandwich bread recipe is what truly sets it apart. The milk adds richness and helps to tenderize the crumb, resulting in a softer loaf with a finer texture. It also contributes to the beautiful golden-brown crust. Butter, on the other hand, adds flavor, keeps the bread moist, and contributes to its delightful softness. Using softened butter that's at room temperature ensures it incorporates smoothly into the dough, providing a more even distribution of fat and a superior final product. These dairy components make this sandwich bread recipe truly decadent and delicious.
Step-by-Step Guide with Pro Tips for this Sandwich Bread Recipe
Let's get baking! Follow these steps closely for a perfect loaf every time.
- Step 1: Activate the yeast. In a large bowl, combine the warm milk (ensure it's between 105-115°F / 40-46°C), sugar, and active dry yeast. Stir gently and let it sit for 5-10 minutes until foamy. This shows your yeast is alive and active, ready to create a fantastic sandwich bread recipe.
- Step 2: Combine wet and dry ingredients. To the yeast mixture, add the melted butter and salt. Stir well. Gradually add 2 cups of the all-purpose flour, mixing with a wooden spoon until just combined.
- Step 3: Knead the dough. Add the remaining flour, 1/2 cup at a time, mixing until a shaggy dough forms. Turn the dough out onto a lightly floured surface. Knead for 8-10 minutes, or until the dough is smooth, elastic, and no longer sticky. It should spring back when lightly poked. This kneading is crucial for developing the gluten in this sandwich bread recipe.
- Step 4: First rise (Bulk Fermentation). Lightly grease a large bowl with oil. Place the dough in the bowl, turning once to coat. Cover the bowl with plastic wrap or a clean kitchen towel. Let it rise in a warm place for 1 to 1.5 hours, or until doubled in size. A warm oven (turned off, with just the light on) is an excellent spot for rising.
- Step 5: Shape the loaf. Gently punch down the risen dough to release the air. Turn it out onto a lightly floured surface. Flatten the dough into a rectangle, about 9x12 inches. Starting from one of the shorter ends, tightly roll the dough into a log. Pinch the seam closed and tuck the ends under to create a neat loaf shape. This careful shaping helps ensure a uniform crumb for your sandwich bread recipe.
- Step 6: Second rise (Proofing). Grease a 9x5-inch loaf pan. Place the shaped dough seam-side down into the prepared pan. Cover loosely with plastic wrap or a clean kitchen towel. Let it rise again in a warm place for 30-45 minutes, or until it has risen about 1 inch above the rim of the pan.
- Step 7: Bake the bread. Preheat your oven to 375°F (190°C). Bake for 30-35 minutes, or until the crust is golden brown and the internal temperature reaches 200-210°F (93-99°C) when measured with an instant-read thermometer. If the top is browning too quickly, you can loosely tent it with aluminum foil.
- Step 8: Cool completely. Once baked, immediately remove the bread from the loaf pan and place it on a wire rack to cool completely before slicing. Slicing warm bread can lead to a gummy texture. Patience is a virtue here! Storing your cooled bread in an airtight container or a Basics Glass Food Storage container will help keep it fresh for days.
Variations & Serving Suggestions for Your Sandwich Bread Recipe
This classic sandwich bread recipe is incredibly versatile. Here are some ideas to customize it and enjoy it in different ways:
Creative Variations:
- Whole Wheat Blend: For a healthier twist, substitute up to 1 cup of the all-purpose flour with whole wheat flour. You might need a tablespoon or two more liquid as whole wheat flour absorbs more. This makes for a more rustic, hearty loaf.
- Herb Infused: Add 1-2 tablespoons of dried herbs like rosemary, thyme, or oregano to the dry ingredients for an aromatic loaf perfect with savory meals or as toast points for a hearty soup.
- Cheese & Garlic: Incorporate 1/2 cup shredded sharp cheddar or Parmesan cheese and 1-2 cloves of minced garlic (added with the wet ingredients) into the dough for a flavorful bread that’s fantastic with pasta or chili.
- Sweet Swirl: Before rolling the dough in Step 5, spread a thin layer of cinnamon sugar or a mix of brown sugar and pecans for a delightful sweet bread.
Serving Suggestions:
- Classic Sandwiches: Of course, this bread shines in classic sandwiches! Think a simple peanut butter and jelly, a hearty turkey and provolone, or a delicious grilled cheese.
- Avocado Toast: Thick slices, toasted to perfection, topped with mashed avocado, a sprinkle of flaky sea salt, and a dash of red pepper flakes – pure breakfast bliss.
- Croutons or Breadcrumbs: If you have any leftover slices (unlikely!), they make excellent homemade croutons for salads or breadcrumbs for coating chicken or fish.
- French Toast: This rich, fluffy bread is absolutely divine transformed into golden French toast for a special breakfast or brunch.
- With Hearty Meals: Serve warm slices alongside a comforting bowl of Marinated Flank Steak for dipping in savory juices.
Nutrition Information
Here's a breakdown of the nutritional content for one serving of this homemade sandwich bread recipe. Please note these are estimates and can vary based on ingredients and portion sizes.
| Nutrient | Amount Per Serving |
|---|---|
| Calories | 180 kcal |
| Carbohydrates | 32g |
| Cholesterol | 15mg |
| Total Fat | 4g |
| Fiber | 1g |
| Protein | 6g |
| Saturated Fat | 2.5g |
| Sodium | 280mg |
| Sugar | 4g |
| Trans Fat | 0.1g |
| Unsaturated Fat | 1.5g |
Serving Size: 1 slice (approx. 50g)
Conclusion
Baking your own sandwich bread is one of the most rewarding culinary endeavors, and this sandwich bread recipe makes it accessible to everyone. From the moment the yeast starts to bubble to the first warm, fragrant slice, every step is a pure joy. It’s more than just food; it’s a connection to tradition, a simple pleasure, and a warm invitation to gather around the table. I encourage you to try this recipe, embrace the process, and savor the incredible taste of homemade. Happy baking!
FAQs
How do I know if my yeast is active for this sandwich bread recipe?
To check if your yeast is active, combine it with warm milk (105-115u00b0F / 40-46u00b0C) and a pinch of sugar. Let it sit for 5-10 minutes. If it becomes foamy and bubbly, your yeast is active and ready to use in this sandwich bread recipe. If it doesn't foam, your yeast may be old or the liquid was too hot/cold, and you should start with a fresh batch of yeast.
Can I use bread flour instead of all-purpose flour for this sandwich bread recipe?
Yes, you can use bread flour for this sandwich bread recipe. Bread flour has a higher protein content, which can result in a chewier loaf. You might need to add a touch more liquid if using bread flour, as it absorbs more moisture than all-purpose flour. Both will yield a delicious homemade bread.
What's the best way to store homemade sandwich bread?
Once your homemade sandwich bread has cooled completely, store it in an airtight container or a bread box at room temperature for up to 3-4 days. You can also wrap slices tightly in plastic wrap and then foil, and freeze for up to 3 months. Thaw frozen slices at room temperature or toast directly from frozen for quick enjoyment of this sandwich bread recipe.
Why didn't my sandwich bread rise properly?
Several factors can prevent your sandwich bread from rising: inactive or expired yeast, liquid that was too hot or too cold when activating the yeast, not enough kneading (which develops gluten for structure), or a rising environment that was too cold. Ensure your yeast is fresh, the liquid temperature is accurate, and the dough is properly kneaded and allowed to rise in a warm, draft-free place for the recommended time to achieve a successful sandwich bread recipe.
Classic Homemade Sandwich Bread
This classic homemade sandwich bread recipe yields a perfectly soft, fluffy, and tender loaf that's ideal for all your favorite sandwiches, toast, or alongside a comforting meal. It's an easy-to-follow recipe that will make you ditch store-bought bread forever!
- Total Time: 2 hours 40 minutes
- Yield: 1 (9x5 inch) loaf (12-16 slices) 1x
Ingredients
1 cup warm milk (105-115°F / 40-46°C)
1/4 cup granulated sugar
2 1/4 teaspoons active dry yeast (1 standard packet)
1/4 cup unsalted butter, melted
1 teaspoon salt
3 to 3 1/2 cups all-purpose flour, plus more for dusting
Instructions
Step 1: In a large bowl, combine the warm milk, sugar, and active dry yeast. Stir gently and let it sit for 5-10 minutes until foamy. This indicates the yeast is active.
Step 2: To the yeast mixture, add the melted butter and salt. Stir well to combine these wet ingredients.
Step 3: Gradually add 2 cups of the all-purpose flour, mixing with a wooden spoon until just combined. The mixture will be shaggy.
Step 4: Add the remaining flour, 1/2 cup at a time, mixing until a shaggy dough forms that pulls away from the sides of the bowl. Turn the dough out onto a lightly floured surface.
Step 5: Knead the dough for 8-10 minutes, or until it is smooth, elastic, and no longer sticky. It should spring back when lightly poked. Add minimal additional flour only if necessary to prevent excessive stickiness.
Step 6: Lightly grease a large clean bowl with oil. Place the dough in the bowl, turning once to coat. Cover the bowl with plastic wrap or a clean kitchen towel. Let it rise in a warm place for 1 to 1.5 hours, or until doubled in size.
Step 7: Gently punch down the risen dough to release the air. Turn it out onto a lightly floured surface. Flatten the dough into a rectangle, approximately 9x12 inches.
Step 8: Starting from one of the shorter ends, tightly roll the dough into a log. Pinch the seam closed and tuck the ends under to create a neat loaf shape.
Step 9: Grease a 9x5-inch loaf pan. Place the shaped dough seam-side down into the prepared pan. Cover loosely with plastic wrap or a clean kitchen towel.
Step 10: Let the dough rise again in a warm place for 30-45 minutes, or until it has risen about 1 inch above the rim of the pan.
Step 11: Preheat your oven to 375°F (190°C).
Step 12: Bake for 30-35 minutes, or until the crust is golden brown and the internal temperature reaches 200-210°F (93-99°C) when measured with an instant-read thermometer. If the top browns too quickly, loosely tent with foil.
Step 13: Once baked, immediately remove the bread from the loaf pan and place it on a wire rack to cool completely before slicing. Slicing warm bread can result in a gummy texture.
Notes
Ensure your milk is not too hot when activating yeast, as this can kill the yeast. A food thermometer is helpful here. For best results, use fresh yeast. Let the bread cool completely before slicing to maintain its best texture. Store in an airtight container at room temperature for up to 3-4 days, or freeze slices for longer storage.
- Prep Time: 25 minutes
- Cook Time: 35 minutes
- Category: Desserts & Baking
- Cuisine: American
Nutrition
- Serving Size: 1 slice (approx. 50g)
- Calories: 180 kcal
- Sugar: 4g
- Sodium: 280mg
- Fat: 4g
- Saturated Fat: 2.5g
- Unsaturated Fat: 1.5g
- Trans Fat: 0.1g
- Carbohydrates: 32g
- Fiber: 1g
- Protein: 6g
- Cholesterol: 15mg
Leave a Reply