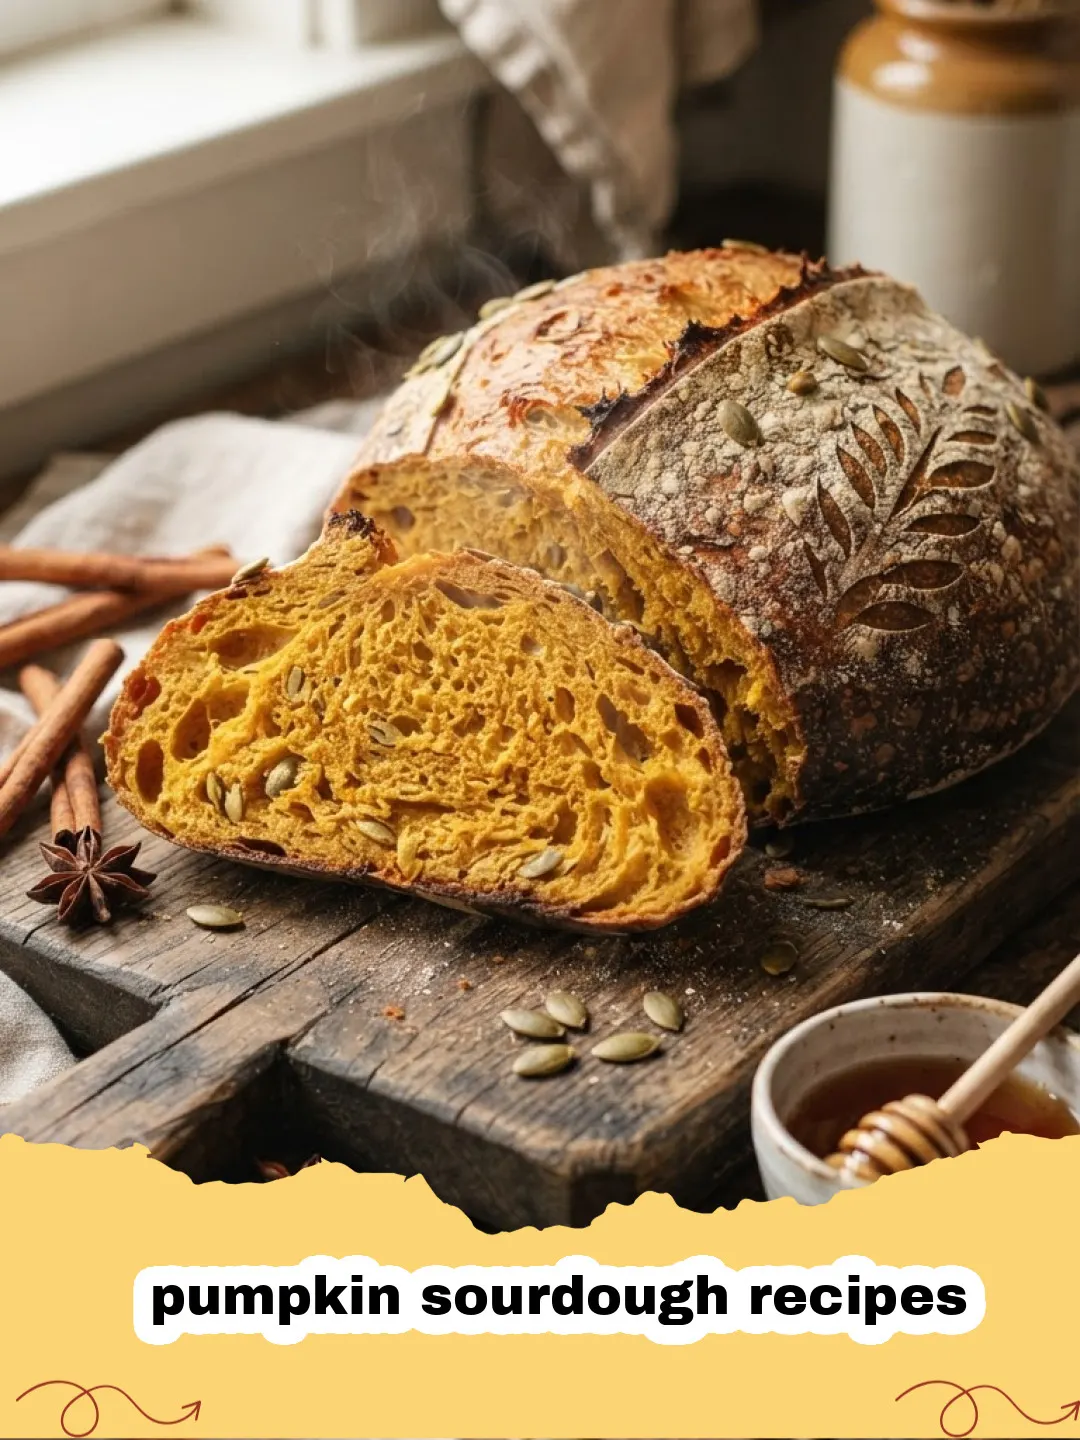
As the leaves begin their fiery dance and the air takes on that crisp, inviting chill, my kitchen transforms. It’s no longer just a place for cooking; it becomes a sanctuary of warmth, spices, and the comforting aroma of baking. There’s something truly magical about autumn, and for me, it always culminates in the art of baking. Over the years, I’ve perfected many fall-inspired bakes, but nothing quite captures the essence of the season like a beautifully crafted loaf of pumpkin sourdough. These pumpkin sourdough recipes aren't just about bread; they're about embracing the slow, deliberate rhythm of fermentation, the satisfying stretch of dough, and the incredible reward of a golden, fragrant crust. This particular recipe for a Pumpkin Sourdough Loaf started as a simple experiment and quickly became a cherished tradition, a testament to the fact that some of the best culinary adventures begin with a little bit of curiosity and a lot of love.
Why This Recipe is a Must-Try
Unforgettable Flavor Profile
The subtle sweetness of pumpkin, combined with warming spices like cinnamon and nutmeg, perfectly balances the signature tang of sourdough. It’s a harmonious blend that sings of autumn and elevates everyday bread into something extraordinary. This balance is what makes these pumpkin sourdough recipes truly special.
Incredible Texture
Achieve a crust that’s delightfully crisp and chewy, yielding to an interior that is soft, airy, and moist, thanks to the pumpkin puree. The structure holds up beautifully, whether you're slicing it thick for toast or tearing off a piece to enjoy plain. Mastering these pumpkin sourdough recipes will give you an unparalleled textural experience.
Versatile and Comforting
Beyond a simple loaf, this dough is incredibly versatile. It’s perfect for sandwiches, toast, or alongside a hearty soup. It brings a touch of cozy elegance to any meal and is a beloved addition to any fall gathering. You'll find countless ways to enjoy the deliciousness from these pumpkin sourdough recipes.
A Rewarding Baking Experience
While sourdough might seem intimidating, this recipe is designed to guide you through each step, making the process enjoyable and deeply satisfying. There’s immense pride in pulling a gorgeous pumpkin sourdough loaf from your oven. The journey of making these pumpkin sourdough recipes is as fulfilling as the final product.
Key Ingredient Notes
Sourdough Starter
Your sourdough starter is the heart and soul of these pumpkin sourdough recipes. Ensure it's active and robust – meaning it doubles in size within 4-6 hours after feeding, with plenty of bubbles. A strong starter ensures good lift and a consistent crumb. If your starter seems sluggish, give it a few extra feedings before baking. A well-maintained starter is crucial for the success of any of these delightful pumpkin sourdough recipes.
Pumpkin Puree
Use 100% pure pumpkin puree, not pumpkin pie filling. The latter contains added sugars and spices that will alter the flavor and hydration of your dough. Homemade pumpkin puree is fantastic if you have it, but canned pure pumpkin works perfectly well. The natural moisture and sweetness of the pumpkin puree contribute significantly to the unique character of these pumpkin sourdough recipes, giving them their signature flavor and color.
Warm Spices
Cinnamon, nutmeg, ginger, and cloves are the quintessential fall spices that truly make these pumpkin sourdough recipes shine. Adjust the quantities to your preference; a little extra cinnamon never hurt anyone! Freshly ground spices will always offer a more potent and aromatic punch. These spices don't just add flavor; they evoke the very spirit of autumn, making each bite of your pumpkin sourdough loaf a comforting experience.
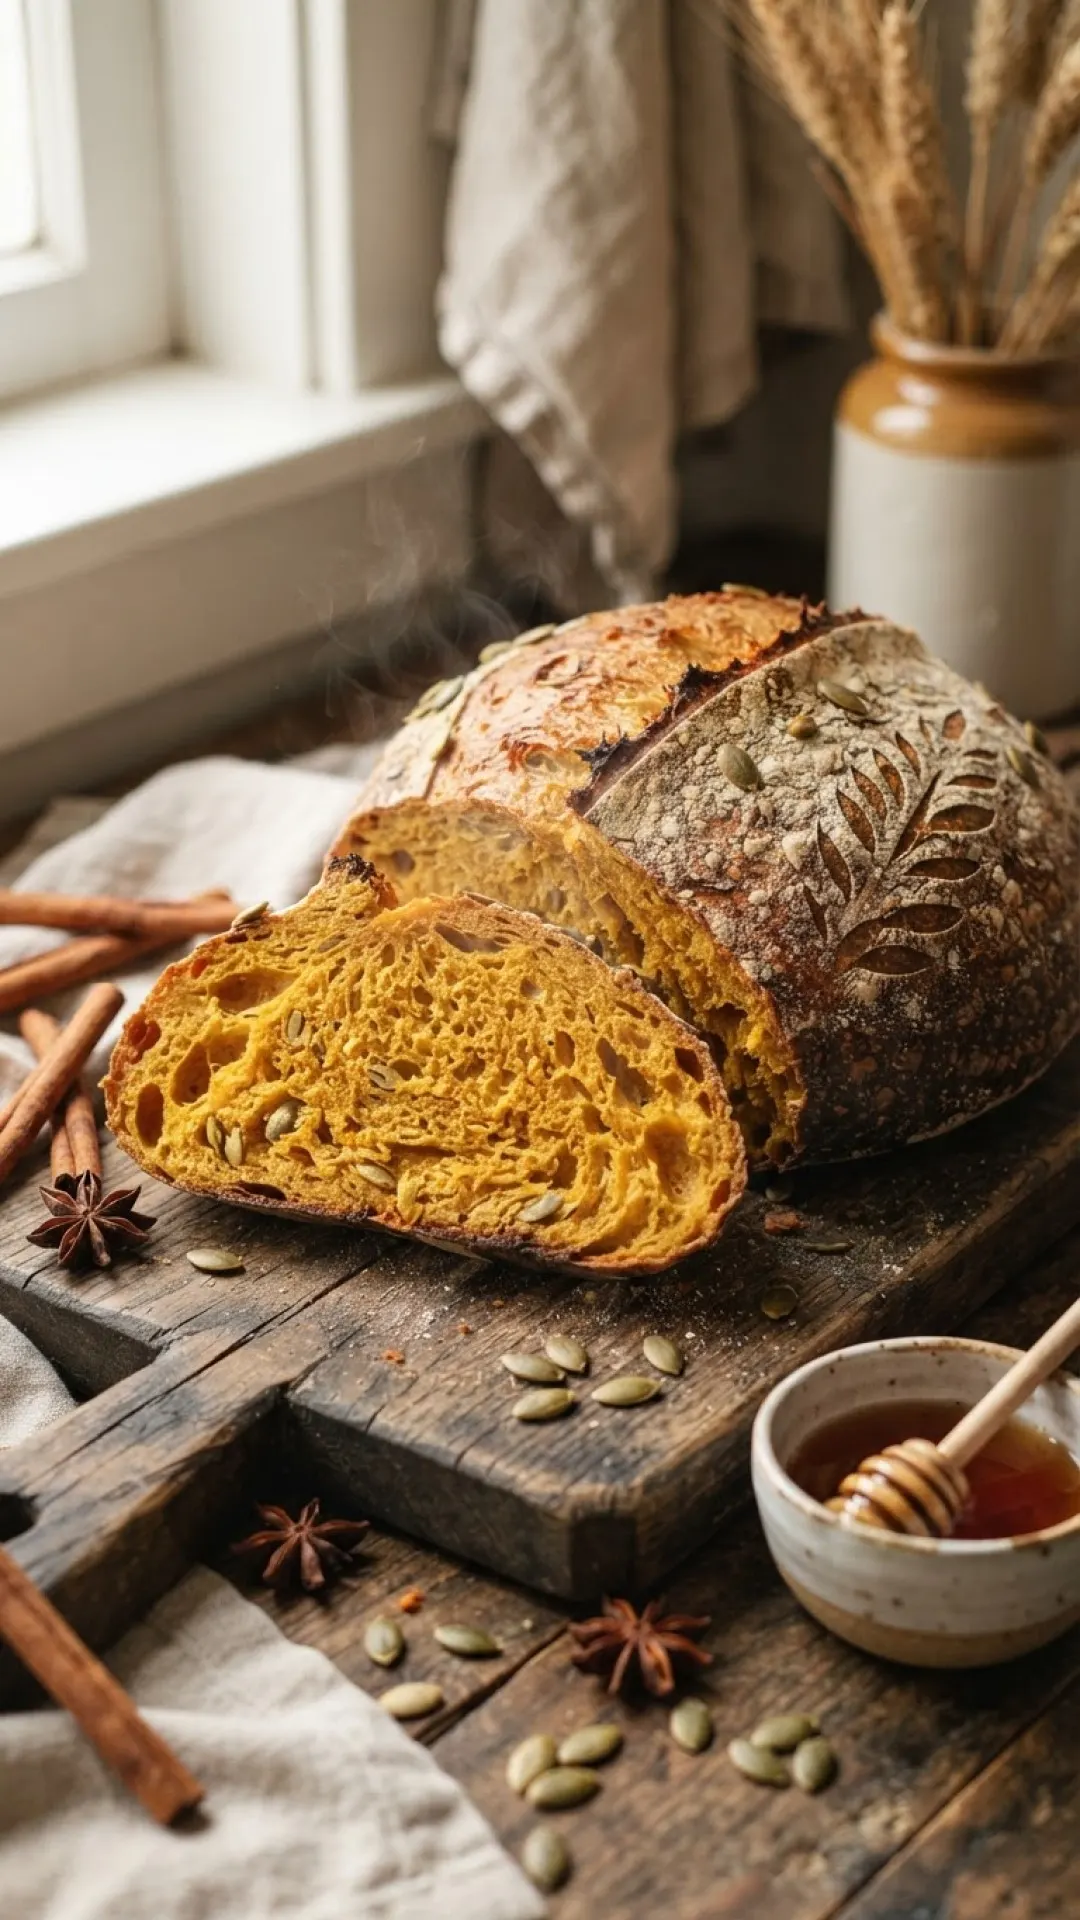
Step-by-Step Guide with Pro Tips
Building Your Pumpkin Sourdough Loaf
Embarking on the journey of these pumpkin sourdough recipes is a rewarding process that requires patience and attention to detail. Don't rush, and trust the process.
- Step 1: In a large bowl, combine 100g active sourdough starter, 300g warm water, and 200g pumpkin puree. Mix until well combined and the starter is mostly dissolved. This is the foundation of your delicious pumpkin sourdough recipes, ensuring even distribution of the pumpkin flavor.
- Step 2: Add 500g strong bread flour, 10g fine sea salt, 2 tsp ground cinnamon, 1 tsp ground nutmeg, 1/2 tsp ground ginger, and 1/4 tsp ground cloves. Mix with your hands until no dry spots remain and a shaggy dough forms. Cover the bowl with a damp cloth or plastic wrap and let it rest for 30 minutes (autolyse). This resting period allows the flour to fully hydrate, a critical step for developing the gluten in these pumpkin sourdough recipes.
- Step 3: After autolyse, perform your first set of stretch and folds. With wet hands, gently grab a portion of the dough, stretch it upwards, and fold it over itself. Rotate the bowl a quarter turn and repeat this motion until you've completed 4-6 stretches and folds. Cover and rest for 30 minutes. This process helps build strength and structure in your pumpkin sourdough.
- Step 4: Repeat the stretch and fold process three more times, with 30-minute rests in between each set. After the final set, the dough should be smoother, more elastic, and have developed some strength. This series of folds is essential for achieving that open, airy crumb in your pumpkin sourdough recipes.
- Step 5: Cover the bowl and let the dough bulk ferment at room temperature (around 70-75°F / 21-24°C) for 4-6 hours, or until it has increased in volume by about 30-50% and shows signs of activity (some bubbles on the surface, jiggles when shaken). The exact time will depend on your kitchen temperature and starter strength. This is where the magic of these pumpkin sourdough recipes really happens.
- Step 6: Gently turn the dough out onto a lightly floured surface. Divide the dough in half (if making two smaller loaves) or keep as one. Lightly shape each piece into a rough circle or rectangle by gently pulling the edges towards the center. Cover and let rest for 20 minutes. This pre-shaping helps relax the gluten, preparing it for the final shape of your pumpkin sourdough.
- Step 7: Perform the final shaping. For a round loaf, gently flatten the dough into a circle. Fold the top third down to the center, then the bottom third up to overlap. Fold the sides in, then roll the dough towards you, creating tension on the surface. Pinch the seam shut. Place the shaped dough, seam-side up, into a floured banneton basket or a bowl lined with a floured tea towel. These pumpkin sourdough recipes benefit greatly from proper tension.
- Step 8: Cover the banneton with plastic wrap or place it in a large plastic bag to prevent drying. Cold proof the dough in the refrigerator for 12-18 hours, or up to 24 hours. Cold proofing develops flavor and makes the dough easier to handle. This long, slow fermentation is key to the deep flavor of these pumpkin sourdough recipes.
- Step 9: Preheat your oven to 450°F (232°C) with a Dutch oven inside for at least 30 minutes. Carefully remove the hot Dutch oven. Gently invert your cold dough into the hot Dutch oven. Score the top of the dough with a sharp razor blade or lame. This allows the loaf to expand beautifully.
- Step 10: Cover the Dutch oven and bake for 30 minutes. Remove the lid and continue baking for another 20-25 minutes, or until the crust is deeply golden brown and the internal temperature reaches 200-210°F (93-99°C). The initial covered bake creates steam, giving your pumpkin sourdough a spectacular crust.
- Step 11: Carefully remove the loaf from the Dutch oven and transfer it to a wire rack to cool completely before slicing (at least 2 hours). Slicing warm sourdough can result in a gummy interior. Enjoy your beautiful homemade pumpkin sourdough! Store any leftover pumpkin sourdough in an airtight container for up to 3-4 days, or freeze for longer storage. For airtight storage, consider using Basics Glass Food Storage containers. These are excellent for keeping your pumpkin sourdough recipes fresh.
Variations & Serving Suggestions
Once you master the basic pumpkin sourdough recipes, the possibilities are endless!
Sweet Swirl
Before the final shaping, spread a mixture of 2 tbsp melted butter, 1 tbsp brown sugar, and 1 tsp cinnamon over the flattened dough. Roll it up as you would for shaping and proceed with proofing and baking. This creates a delightful cinnamon swirl pumpkin sourdough, similar to pumpkin cinnamon rolls, but in a loaf form.
Nutty Addition
Fold in 1/2 cup chopped pecans or walnuts during the final set of stretch and folds for an added crunch and earthy flavor. These additions complement the warming spices of these pumpkin sourdough recipes beautifully.
Savory Twist
For a savory loaf, omit the ginger and cloves, and instead add 1/2 cup grated sharp cheddar cheese and 2 tbsp chopped fresh rosemary to the dough during the final stretch and folds. This makes a fantastic accompaniment to fall soups and stews.
Serving Suggestions
This pumpkin sourdough loaf is amazing toasted with a smear of cream cheese, butter, or even a drizzle of maple syrup. It also makes incredible grilled cheese sandwiches or the perfect base for a turkey and cranberry sandwich. For breakfast, try it with a dollop of Greek yogurt and a sprinkle of granola. The versatility of these pumpkin sourdough recipes makes them a staple.
Nutrition Information
| Nutrient | Amount per Serving |
|---|---|
| Calories | 280 kcal |
| Carbohydrate Content | 55g |
| Cholesterol Content | 0mg |
| Fat Content | 2g |
| Fiber Content | 3g |
| Protein Content | 10g |
| Saturated Fat Content | 0.3g |
| Serving Size | 1 slice (approx. 70g) |
| Sodium Content | 350mg |
| Sugar Content | 2g |
| Trans Fat Content | 0g |
| Unsaturated Fat Content | 1.5g |
Please note: Nutritional values are estimates and can vary based on specific ingredients and preparation methods for these pumpkin sourdough recipes.
Conclusion
Baking a Pumpkin Sourdough Loaf is more than just making bread; it’s an act of love, a connection to ancient traditions, and a celebration of autumn’s bounty. The aroma filling your home, the crackle of the cooling crust, and that first tender bite are moments of pure joy. I hope these pumpkin sourdough recipes inspire you to get your hands messy, embrace the waiting, and create something truly spectacular. Happy baking, and may your autumn be filled with warmth, comfort, and delicious pumpkin sourdough!
FAQs
Can I use canned pumpkin pie filling instead of pure pumpkin puree for these pumpkin sourdough recipes?
No, it's crucial to use 100% pure pumpkin puree, not pumpkin pie filling. Pie filling contains added sugars and spices, which will significantly alter the flavor, texture, and hydration of your sourdough dough, potentially leading to a very different and less desirable result. Stick to pure pumpkin for the best pumpkin sourdough recipes.
How do I know if my sourdough starter is active enough for these pumpkin sourdough recipes?
An active sourdough starter for these pumpkin sourdough recipes should double in size within 4-6 hours after being fed, showing plenty of bubbles on the surface and sides. It should also pass the 'float test' u2013 a small spoonful dropped into water should float. If it sinks, your starter might need another feeding or two to strengthen up before baking.
Can I freeze my pumpkin sourdough loaf?
Absolutely! Once your pumpkin sourdough loaf has cooled completely, you can slice it and freeze individual slices, or freeze the whole loaf. Wrap it tightly in plastic wrap, then aluminum foil, and place it in a freezer-safe bag. It can be stored for up to 3 months. Thaw at room temperature or toast slices directly from frozen for a quick treat. Freezing is a great way to enjoy these pumpkin sourdough recipes later.
What is cold proofing and why is it important for pumpkin sourdough recipes?
Cold proofing, or retarding, involves placing the shaped sourdough dough in the refrigerator for an extended period (typically 12-24 hours). This slow, cold fermentation develops a more complex flavor profile in your pumpkin sourdough, makes the dough easier to handle (as it stiffens), and allows for better oven spring due to the chilled state of the dough when it hits the hot oven. It's a key step for artisanal pumpkin sourdough recipes.
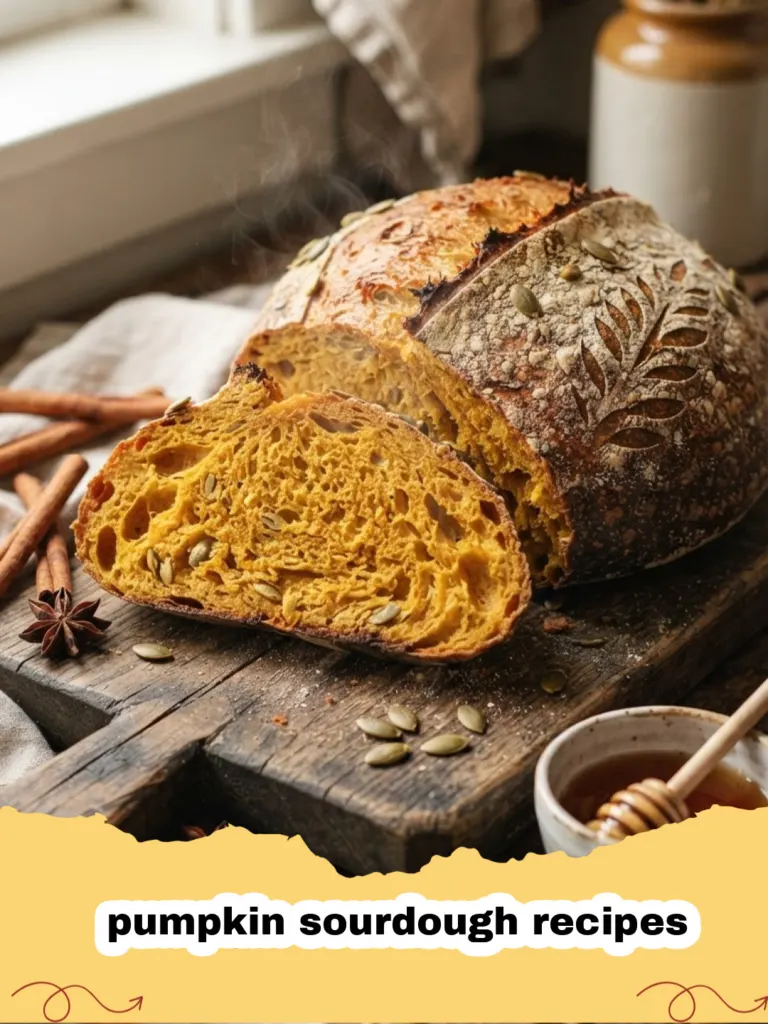
Ultimate Autumn Pumpkin Sourdough Loaf
A delightful sourdough bread infused with the warm flavors of pumpkin puree and aromatic fall spices, featuring a beautiful crust and soft, airy crumb. These pumpkin sourdough recipes are a perfect fall baking project.
- Total Time: 14-26 hours (including proofing)
- Yield: 1 large loaf (or 2 small loaves) 1x
Ingredients
100g active sourdough starter
300g warm water
200g pumpkin puree (100% pure, not pie filling)
500g strong bread flour
10g fine sea salt
2 tsp ground cinnamon
1 tsp ground nutmeg
1/2 tsp ground ginger
1/4 tsp ground cloves
Instructions
Step 1: In a large bowl, combine 100g active sourdough starter, 300g warm water, and 200g pumpkin puree. Mix until well combined and the starter is mostly dissolved.
Step 2: Add 500g strong bread flour, 10g fine sea salt, 2 tsp ground cinnamon, 1 tsp ground nutmeg, 1/2 tsp ground ginger, and 1/4 tsp ground cloves. Mix with your hands until no dry spots remain and a shaggy dough forms. Cover the bowl with a damp cloth or plastic wrap and let it rest for 30 minutes (autolyse).
Step 3: After autolyse, perform your first set of stretch and folds. With wet hands, gently grab a portion of the dough, stretch it upwards, and fold it over itself. Rotate the bowl a quarter turn and repeat this motion until you've completed 4-6 stretches and folds. Cover and rest for 30 minutes.
Step 4: Repeat the stretch and fold process three more times, with 30-minute rests in between each set. After the final set, the dough should be smoother, more elastic, and have developed some strength.
Step 5: Cover the bowl and let the dough bulk ferment at room temperature (around 70-75°F / 21-24°C) for 4-6 hours, or until it has increased in volume by about 30-50% and shows signs of activity (some bubbles on the surface, jiggles when shaken). The exact time will depend on your kitchen temperature and starter strength.
Step 6: Gently turn the dough out onto a lightly floured surface. Divide the dough in half (if making two smaller loaves) or keep as one. Lightly shape each piece into a rough circle or rectangle by gently pulling the edges towards the center. Cover and let rest for 20 minutes.
Step 7: Perform the final shaping. For a round loaf, gently flatten the dough into a circle. Fold the top third down to the center, then the bottom third up to overlap. Fold the sides in, then roll the dough towards you, creating tension on the surface. Pinch the seam shut. Place the shaped dough, seam-side up, into a floured banneton basket or a bowl lined with a floured tea towel.
Step 8: Cover the banneton with plastic wrap or place it in a large plastic bag to prevent drying. Cold proof the dough in the refrigerator for 12-18 hours, or up to 24 hours.
Step 9: Preheat your oven to 450°F (232°C) with a Dutch oven inside for at least 30 minutes. Carefully remove the hot Dutch oven. Gently invert your cold dough into the hot Dutch oven. Score the top of the dough with a sharp razor blade or lame.
Step 10: Cover the Dutch oven and bake for 30 minutes. Remove the lid and continue baking for another 20-25 minutes, or until the crust is deeply golden brown and the internal temperature reaches 200-210°F (93-99°C).
Step 11: Carefully remove the loaf from the Dutch oven and transfer it to a wire rack to cool completely before slicing (at least 2 hours). Slicing warm sourdough can result in a gummy interior. Enjoy your beautiful homemade pumpkin sourdough!
Notes
Ensure your sourdough starter is very active for the best rise. Adjust spice levels to your personal preference. Cold proofing is crucial for flavor development and easier handling.
- Prep Time: 30 minutes
- Cook Time: 55 minutes
- Category: Desserts & Baking
- Cuisine: American
Nutrition
- Serving Size: 1 slice (approx. 70g)
- Calories: 280 kcal
- Sugar: 2g
- Sodium: 350mg
- Fat: 2g
- Saturated Fat: 0.3g
- Unsaturated Fat: 1.5g
- Trans Fat: 0g
- Carbohydrates: 55g
- Fiber: 3g
- Protein: 10g
- Cholesterol: 0mg