

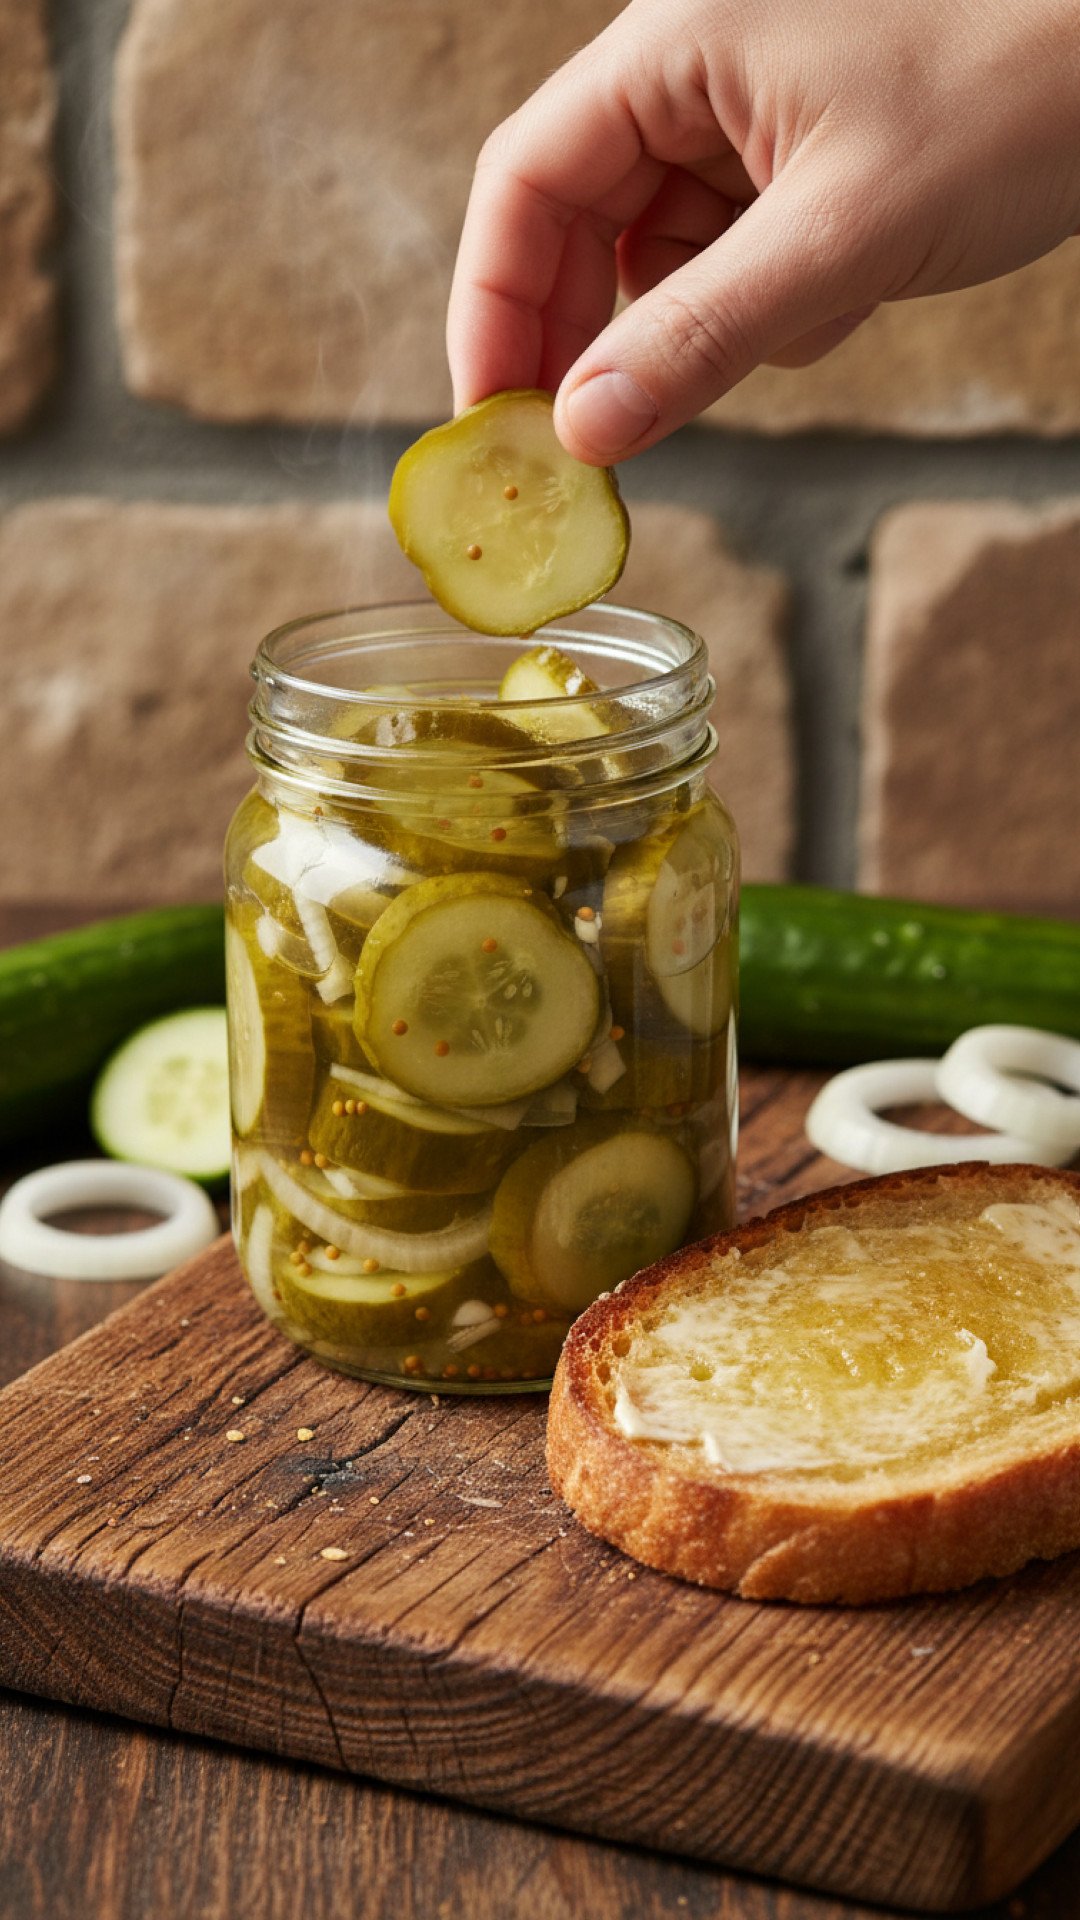
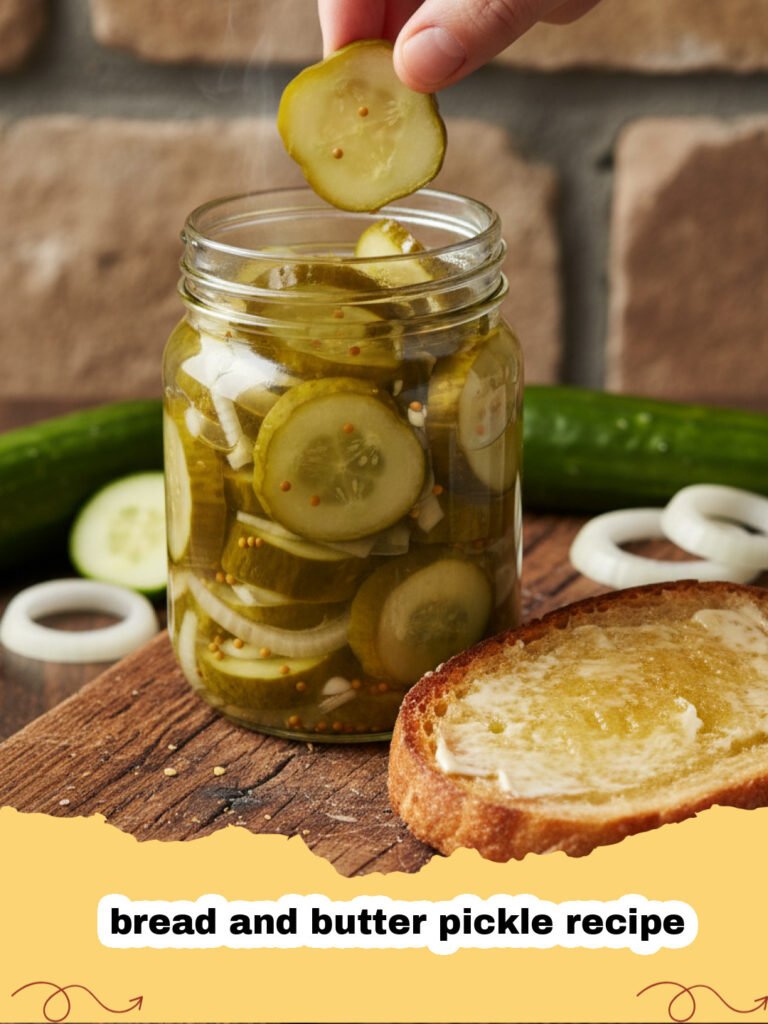
There's a certain magic to summer afternoons, isn't there? For me, it always involved the hum of a rusty fan, the scent of fresh-cut grass, and the distinct aroma of vinegar and spices wafting from my grandmother's kitchen. She was a canning queen, and her bread and butter pickle recipe was legendary. I remember being a curious little shadow, perched on a stool, watching her nimble fingers slice cucumbers with an almost rhythmic precision. The brine, a secret concoction of sweet, tangy, and a hint of spice, would bubble gently on the stove, filling the air with an intoxicating perfume. Those pickles weren't just a condiment; they were a taste of childhood, a tangible piece of summer preserved in a jar. Every crunch was a memory, a story of simpler times and sun-drenched days. Fast forward to today, and while my kitchen might be a bit more modern, the spirit of those pickling afternoons lives on. I'm thrilled to share my perfected bread and butter pickle recipe with you, a recipe that pays homage to my grandmother's legacy while adding a few modern twists for the ultimate sweet and tangy crunch. Get ready to create your own culinary memories!
Why This Bread and Butter Pickle Recipe is a Must-Try
- Unmatched Flavor Profile: Forget those bland store-bought jars! Our homemade bread and butter pickle recipe delivers an incredible balance of sweet, tangy, and subtly spiced notes that will awaken your taste buds. The combination of both white and brown sugar, alongside apple cider vinegar, creates a depth of flavor that's truly addictive.
- Perfectly Crispy Crunch: We employ a crucial salting technique that draws out excess water from the cucumbers, ensuring every slice maintains its delightful snap. No soggy pickles here! This is often the biggest differentiator between good and great homemade bread and butter pickles.
- Versatile Culinary Companion: These pickles aren't just for burgers and sandwiches. They elevate a charcuterie board, add a zesty kick to tuna or potato salad, and can even be enjoyed straight from the jar as a refreshing snack. Their versatility makes this bread and butter pickle recipe a staple in any kitchen.
- The Joy of Homemade: There's immense satisfaction in knowing exactly what goes into your food. Making your own bread and butter pickles means you control the quality of ingredients and can customize the spice level to your liking. Plus, those rows of glistening jars on your shelf? Pure kitchen bragging rights!
Key Ingredient Notes for Perfect Pickles
The success of any great bread and butter pickle recipe hinges on the quality and proper handling of its core ingredients. Here’s a closer look at what makes our version shine:
Cucumbers: The Star of the Show
For the best bread and butter pickles, choose pickling cucumbers. Varieties like Kirby or Persian cucumbers are ideal due to their firm texture, thinner skins, and smaller seeds. Avoid standard slicing cucumbers (like the long English varieties) as they tend to have higher water content and larger seeds, which can result in a less crisp and more watery pickle. Aim for cucumbers that are firm to the touch, blemish-free, and about 4-6 inches long. Consistency in slicing, around 1/4-inch thick, is also key for even brining and cooking.
Onions: The Sweet Counterpart
Sweet onions, such as Vidalia or Walla Walla, are the preferred choice for this bread and butter pickle recipe. Their mild, sweet flavor complements the tanginess of the brine without overpowering the cucumbers. Red onions can also be used for a slightly sharper flavor and a pop of color, but they might not be as traditional. Slice them thinly to ensure they meld seamlessly with the cucumber slices.
Vinegar and Sugar: The Dynamic Duo
Our brine uses a combination of apple cider vinegar and white vinegar. Apple cider vinegar contributes a slightly fruitier, more mellow tang, while white vinegar provides a clean, sharp acidity. This blend creates a balanced flavor profile. For sweetness, we use both granulated sugar and light brown sugar. The brown sugar adds a subtle molasses depth that white sugar alone can't achieve, enhancing the overall complexity of these classic bread and butter pickles.
Step-by-Step Guide with Pro Tips
Creating your own delicious bread and butter pickle recipe at home is an incredibly rewarding experience. Follow these steps carefully for the best results, and don't forget the pro tips!
Preparation is Key
- Step 1: Prepare Cucumbers and Onions. Wash your pickling cucumbers thoroughly under cold water. Using a sharp knife or, even better, a mandoline, slice them into uniform 1/4-inch rounds. This consistency is crucial for even brining and a uniform texture. Peel and thinly slice your sweet onions.
- Step 2: Brine the Vegetables. In a very large non-reactive bowl (glass, ceramic, or food-grade plastic), combine the sliced cucumbers and onions. Sprinkle with the pickling salt and toss thoroughly to ensure every piece is coated. Cover the bowl with plastic wrap and let it sit at room temperature for at least 2 hours, or up to 3 hours. This salting process is vital: it draws out excess water, which helps the cucumbers stay crisp and allows them to better absorb the pickling brine. This is a secret to a truly crunchy bread and butter pickle recipe!
- Step 3: Rinse and Drain. After the brining period, transfer the cucumber and onion mixture to a colander. Rinse them extensively under cold running water for several minutes, tossing gently to remove all traces of excess salt. Taste a small piece; if it's still too salty, rinse again. Drain very, very well, pressing lightly on the vegetables to remove as much residual water as possible. This step prevents your pickles from becoming too salty.
Crafting the Flavorful Brine
- Step 4: Prepare the Brine. In a large non-reactive pot or Dutch oven, combine the apple cider vinegar, white vinegar, granulated sugar, light brown sugar, mustard seeds, celery seeds, ground turmeric, red pepper flakes (if using for a touch of heat), and whole black peppercorns. Bring this mixture to a gentle simmer over medium heat, stirring constantly until both sugars are completely dissolved. Avoid a rolling boil; you just want to reach a point where the sugars integrate fully. This aromatic blend forms the heart of our bread and butter pickle recipe.
Combining and Canning
- Step 5: Combine and Heat. Add the thoroughly rinsed and drained cucumber and onion mixture to the simmering brine. Stir gently to ensure all the vegetables are submerged and coated. Continue to cook for approximately 5-7 minutes. Watch for the cucumbers to turn a slightly more translucent green and become heated through, but critically, they should still retain their crispness. Overcooking at this stage will result in soft pickles.
- Step 6: Pack into Jars. While your pickles are gently simmering, sterilize your pint or quart canning jars and lids according to the manufacturer's instructions. A clean kitchen and sterilized equipment are paramount for successful canning and food safety. Using a slotted spoon, carefully transfer the hot cucumber and onion mixture into the hot, sterilized jars, leaving about 1/2-inch headspace (the space between the food and the rim of the jar).
- Step 7: Ladle Brine and Seal. Ladle the hot pickling brine over the vegetables in each jar, ensuring the vegetables are fully submerged and that you still maintain the 1/2-inch headspace. This ensures proper sealing. Remove any trapped air bubbles by gently tapping the jars on the counter or using a non-metallic utensil to run along the inside edges. Wipe the rims of the jars clean with a damp cloth – any residue can prevent a proper seal. Center the lids on the jars and apply the bands, tightening them finger-tight.
- Step 8: Water Bath Canning (Optional but Recommended for Shelf Stability). For shelf-stable pickles, process the jars in a boiling water canner for 10 minutes. Ensure the jars are covered by at least 1 inch of water throughout the process. Once processing is complete, turn off the heat, remove the canner lid, and let the jars sit in the hot water for 5 minutes before carefully removing them to a wire rack to cool completely for 12-24 hours. Check seals; if any jar doesn't seal (the lid will be loose or pop when pressed), refrigerate that jar and consume within 2-3 weeks. For storing opened jars or non-canned batches, I highly recommend using quality Basics Glass Food Storage containers to keep them fresh.
- Step 9: Cool and Store. Let the sealed jars cool undisturbed on your countertop for 12-24 hours. You should hear characteristic 'pops' as the lids seal. Once cool, verify that the lids are concave and don't flex when pressed. Store properly sealed jars of this bread and butter pickle recipe in a cool, dark place for at least 2 weeks before opening. This allows the flavors to fully meld and develop. Refrigerate after opening and enjoy the fruits of your labor! If you opted not to water bath can, refrigerate the pickles immediately and consume them within 2-3 weeks.
Variations & Serving Suggestions
This bread and butter pickle recipe is fantastic as is, but it's also a wonderful canvas for culinary creativity! Here are some ideas to make them your own and how to best enjoy them:
Spice It Up!
For those who love a little heat, consider adding a few extra dashes of red pepper flakes to the brine. You could also thinly slice a fresh jalapeño or serrano pepper and add it to the jars with the cucumbers before pouring in the brine. If you're really adventurous, check out my Cowboy Candy recipe for another sweet and spicy pickled treat!
Garlic Infusion
While traditional bread and butter pickles don't always feature prominent garlic, a clove or two, thinly sliced and added to each jar, can add a delightful aromatic depth. Just be mindful not to overpower the delicate sweet and tangy balance.
Herbal Notes
A sprig of fresh dill or a bay leaf added to each jar before sealing can introduce subtle herbal undertones. Experiment to find your favorite combination!
Serving Suggestions
- Classic Pairings: The quintessential accompaniment to burgers, hot dogs, and sandwiches of all kinds. Their sweet and tangy crunch cuts through rich meats and creamy sauces beautifully.
- Elevated Snacks: Serve them straight from the jar as a refreshing snack, or arrange them on a charcuterie board alongside cheeses, cured meats, and crackers.
- Chopped & Mixed: Finely chop these pickles and fold them into tuna salad, chicken salad, egg salad, or even a classic coleslaw for an extra layer of flavor and texture.
- Garnish Galore: Use them as a vibrant garnish for a Bloody Mary or a pickled component on a build-your-own taco bar.
Nutrition Information
| Nutrient | Amount Per Serving |
|---|---|
| Calories | 25 kcal |
| Carbohydrates | 6g |
| Cholesterol | 0mg |
| Fat | 0g |
| Fiber | 0.5g |
| Protein | 0g |
| Saturated Fat | 0g |
| Serving Size | 1/4 cup (about 4-5 slices) |
| Sodium | 150mg |
| Sugar | 5g |
| Trans Fat | 0g |
| Unsaturated Fat | 0g |
Conclusion
Making your own bread and butter pickles is more than just a culinary task; it's an act of preserving summer, of carrying on a delicious tradition, and of creating something truly special with your own hands. This bread and butter pickle recipe has been perfected over years, offering that ideal balance of sweet, sour, and spice with an irresistible crunch. Whether you're a seasoned canner or a first-timer, this recipe is designed for success. So, gather your cucumbers, fire up the stove, and prepare to fill your pantry (and your belly!) with the best homemade bread and butter pickles you've ever tasted. Enjoy the journey, and happy pickling!
FAQs
What kind of cucumbers are best for bread and butter pickles?
For the crispiest and most flavorful bread and butter pickles, pickling cucumbers like Kirby or Persian varieties are ideal. They have thinner skins, fewer seeds, and a firm texture that holds up well during the pickling process. Avoid standard slicing cucumbers, as they tend to be watery and softer.
Why do I need to salt the cucumbers before pickling?
Salting the cucumbers and onions before pickling is a crucial step to achieve that desired crisp texture. The salt draws out excess water from the vegetables, concentrating their flavor and preventing the pickles from becoming soggy. It also helps them absorb the pickling brine more effectively, enhancing the overall taste of your homemade bread and butter pickles.
How long do homemade bread and butter pickles last?
If properly water bath canned and sealed, homemade bread and butter pickles can last for up to 1 year in a cool, dark place. Once opened, or if not canned, they should be stored in the refrigerator and consumed within 2-3 weeks for optimal freshness and flavor. Always check for proper seals before storing.
Can I use less sugar in this bread and butter pickle recipe?
Yes, you can adjust the sugar content to your preference. However, be aware that sugar plays a significant role not just in the sweet-tangy flavor balance of bread and butter pickles, but also in the texture and preservation. Reducing sugar too drastically may alter the characteristic taste and could potentially affect the shelf life if you are water bath canning. We recommend trying the recipe as written first, then making minor adjustments in subsequent batches.
Classic Sweet & Tangy Bread and Butter Pickles
A timeless bread and butter pickle recipe yielding perfectly sweet, tangy, and crunchy slices, ideal for sandwiches, burgers, or straight from the jar. This homemade version surpasses any store-bought variety in flavor and freshness.
- Total Time: 2 hours 45 minutes
- Yield: 4 pint jars 1x
Ingredients
4 lbs pickling cucumbers (such as Kirby or Persian), sliced into 1/4-inch rounds
2 large sweet onions, thinly sliced
1/4 cup pickling salt (non-iodized)
2 cups apple cider vinegar
1 cup white vinegar
2 cups granulated sugar
1/2 cup packed light brown sugar
2 tbsp mustard seeds (yellow or brown)
1 tbsp celery seeds
1 tsp ground turmeric
1/2 tsp red pepper flakes (optional, for a slight kick)
1/2 tsp whole black peppercorns
Instructions
Step 1: Prepare Cucumbers and Onions. Wash cucumbers thoroughly. Using a mandoline or sharp knife, slice cucumbers into uniform 1/4-inch rounds. Peel and thinly slice the sweet onions.
Step 2: Brine the Vegetables. In a large non-reactive bowl (glass or ceramic), combine the sliced cucumbers and onions. Sprinkle with pickling salt and toss to coat evenly. Cover the bowl with plastic wrap and let it sit at room temperature for at least 2 hours, or up to 3 hours. This process draws out excess water, ensuring crisp pickles.
Step 3: Rinse and Drain. After brining, drain the cucumber and onion mixture in a colander. Rinse thoroughly under cold running water for several minutes, tossing gently to remove all excess salt. Taste a small piece to ensure it's not too salty; if it is, rinse again. Drain very well, pressing lightly to remove as much water as possible. Set aside.
Step 4: Prepare the Brine. In a large non-reactive pot or Dutch oven, combine apple cider vinegar, white vinegar, granulated sugar, light brown sugar, mustard seeds, celery seeds, ground turmeric, red pepper flakes (if using), and whole black peppercorns. Bring the mixture to a simmer over medium heat, stirring constantly until both sugars are completely dissolved. Do not boil vigorously; just a gentle simmer.
Step 5: Combine and Heat. Add the rinsed and drained cucumber and onion mixture to the simmering brine. Stir gently to ensure all vegetables are submerged. Continue to cook for about 5-7 minutes, just until the cucumbers turn a slightly translucent green and are heated through, but still retain their crunch. Do not overcook, or your pickles will be soft.
Step 6: Pack into Jars. While the pickles are simmering, sterilize your pint or quart canning jars and lids according to manufacturer's instructions. Using a slotted spoon, carefully transfer the hot cucumber and onion mixture into the hot, sterilized jars, leaving about 1/2-inch headspace.
Step 7: Ladle Brine and Seal. Ladle the hot pickling brine over the vegetables in each jar, ensuring the vegetables are fully submerged and maintaining the 1/2-inch headspace. Remove any air bubbles by gently tapping the jars or using a non-metallic utensil. Wipe the rims of the jars clean with a damp cloth. Center the lids on the jars and apply the bands, tightening them finger-tight.
Step 8: Water Bath Canning (Optional but Recommended for Shelf Stability). For shelf-stable pickles, process the jars in a boiling water canner for 10 minutes. Ensure the jars are covered by at least 1 inch of water. Once processing is complete, turn off the heat, remove the canner lid, and let the jars sit in the hot water for 5 minutes before carefully removing them to a wire rack to cool completely for 12-24 hours. Check seals; if any jar doesn't seal, refrigerate and consume within 2-3 weeks.
Step 9: Cool and Store. Let the sealed jars cool undisturbed on a counter for 12-24 hours. You should hear the lids pop as they seal. Once cool, check that the lids are concave and don't flex when pressed. Store properly sealed jars in a cool, dark place for at least 2 weeks before opening to allow flavors to develop. Refrigerate after opening. If not water bath canning, refrigerate immediately and consume within 2-3 weeks.
Notes
For best results, allow the pickles to cure in the refrigerator for at least 2 weeks before eating to allow the flavors to fully meld. Store in a cool, dark place for up to 1 year, or in the refrigerator for 2-3 months after opening. Always use sterilized jars and lids for canning.
- Prep Time: 30 minutes (plus 2 hours brining)
- Cook Time: 15 minutes
- Category: Drinks, Snacks & Holiday Treats
- Cuisine: American
Nutrition
- Serving Size: 1/4 cup (about 4-5 slices)
- Calories: 25 kcal
- Sugar: 5g
- Sodium: 150mg
- Fat: 0g
- Saturated Fat: 0g
- Unsaturated Fat: 0g
- Trans Fat: 0g
- Carbohydrates: 6g
- Fiber: 0.5g
- Protein: 0g
- Cholesterol: 0mg
Leave a Reply