
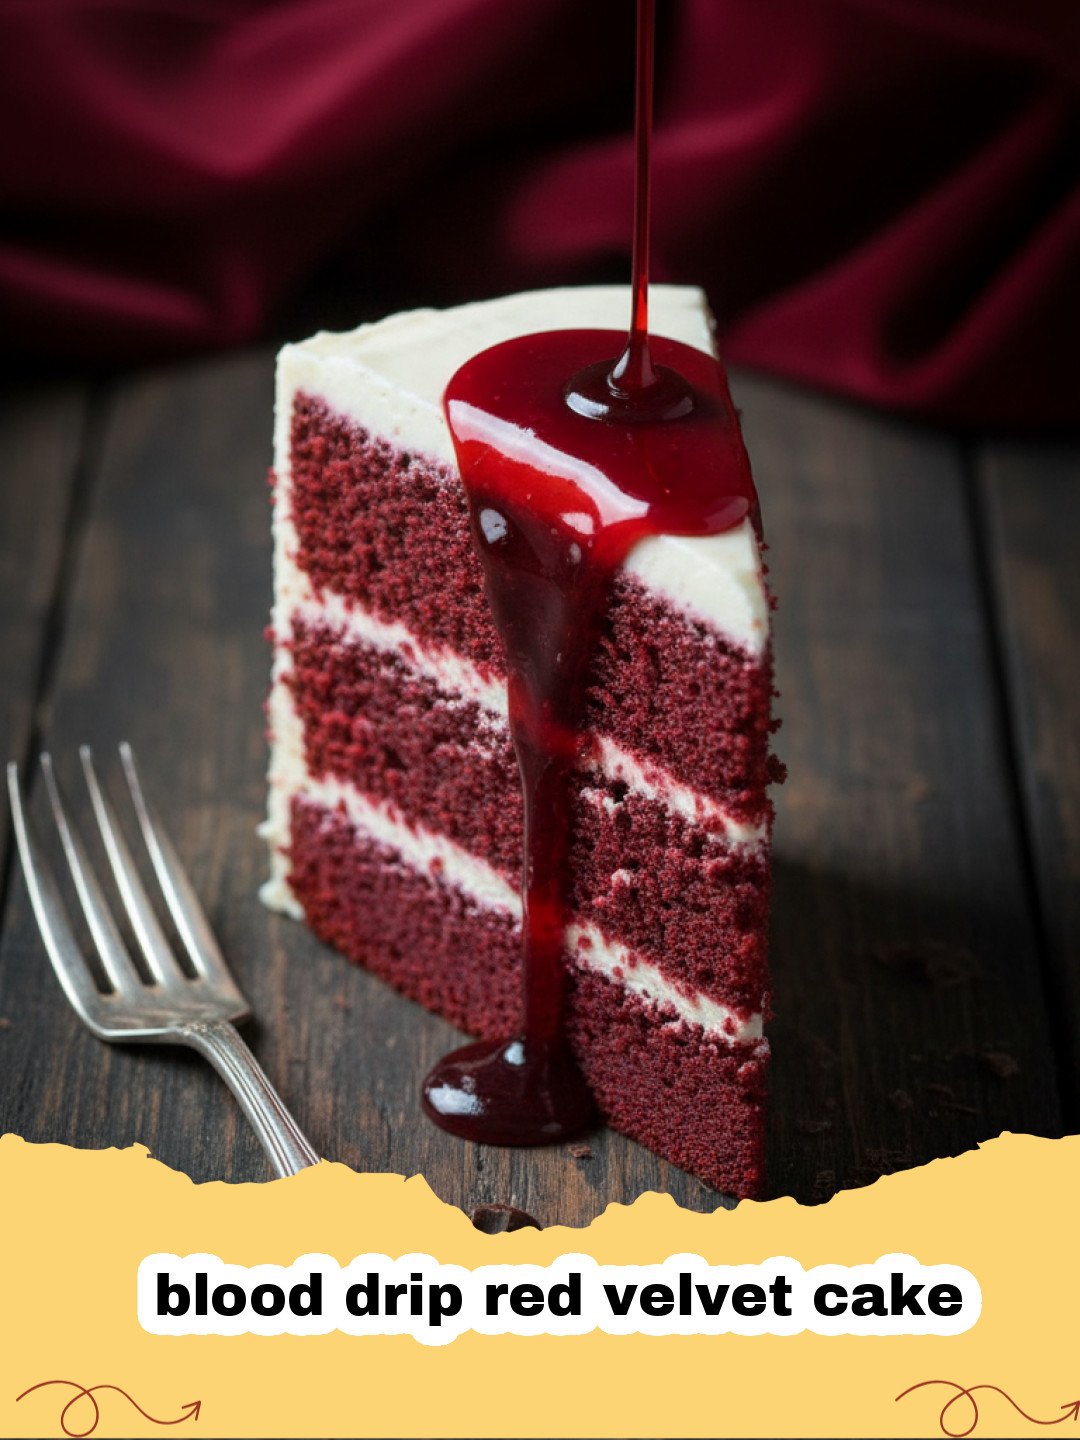
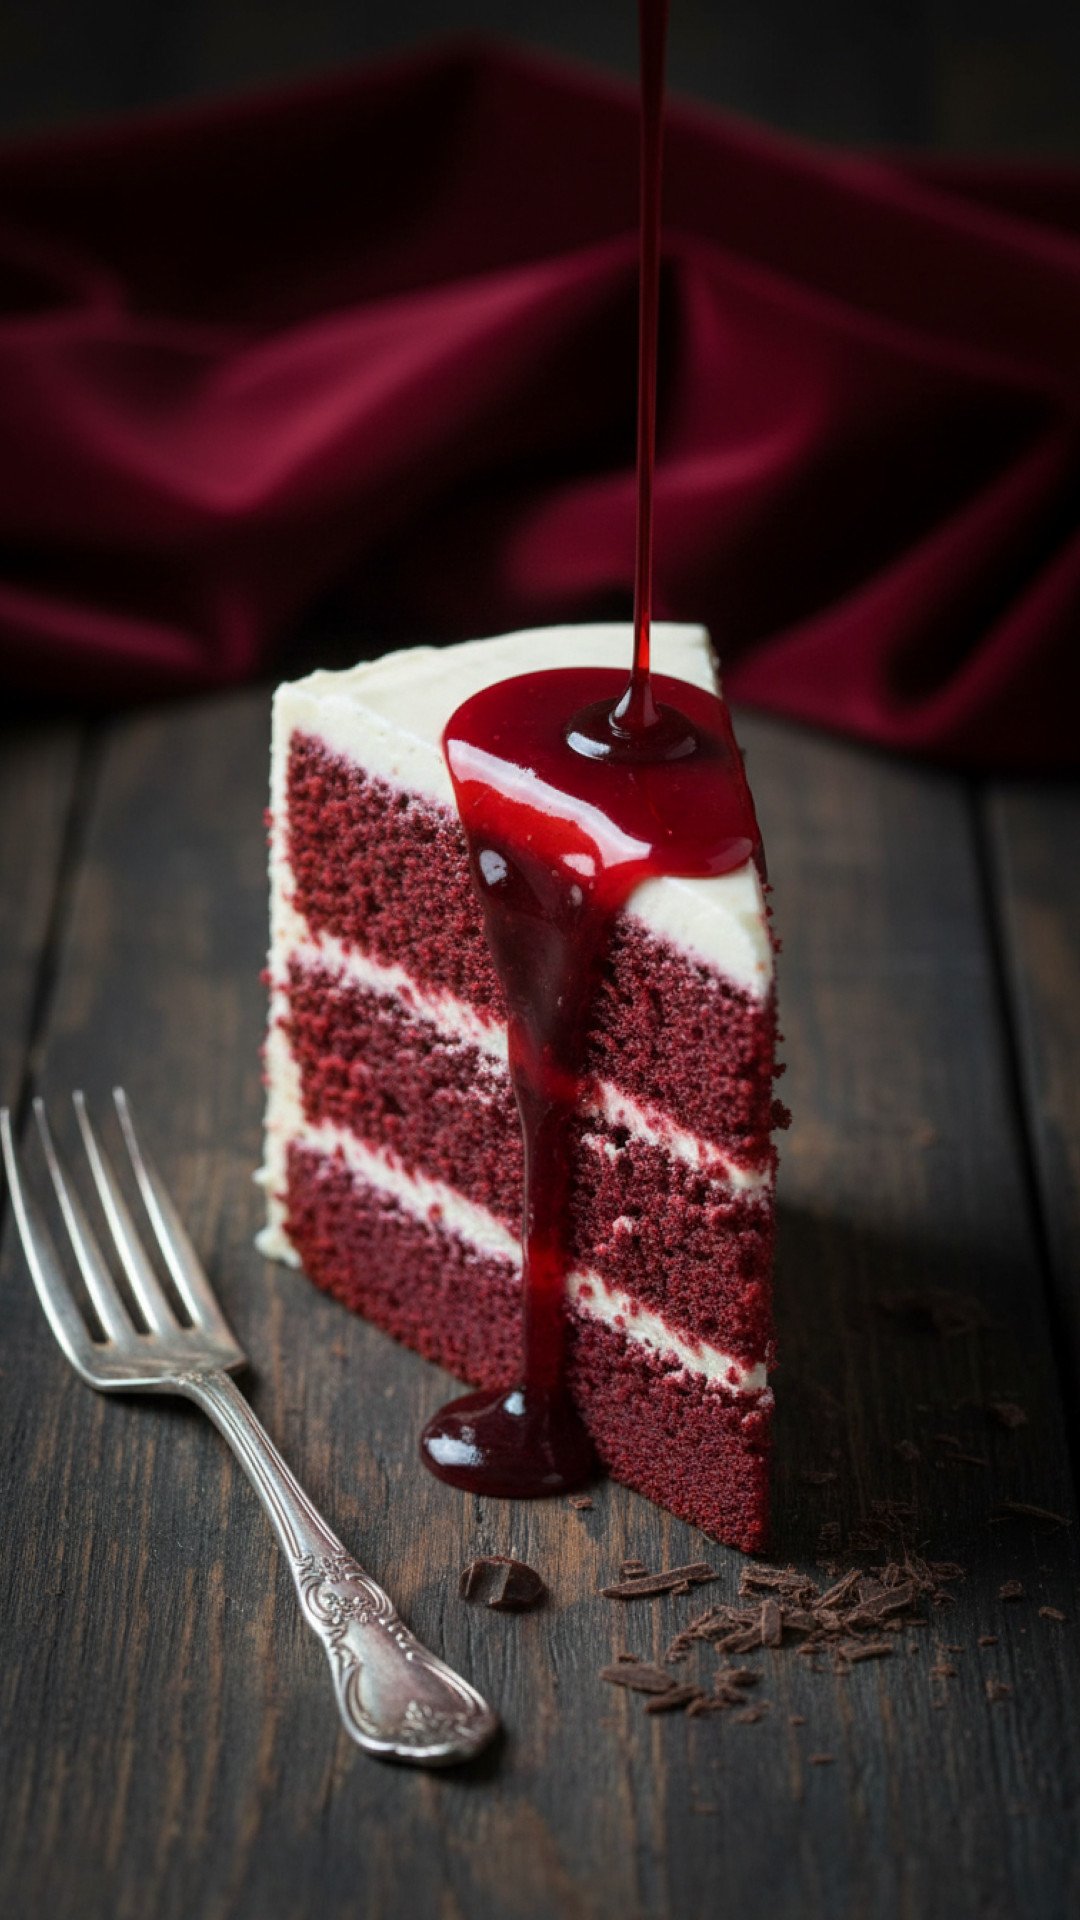
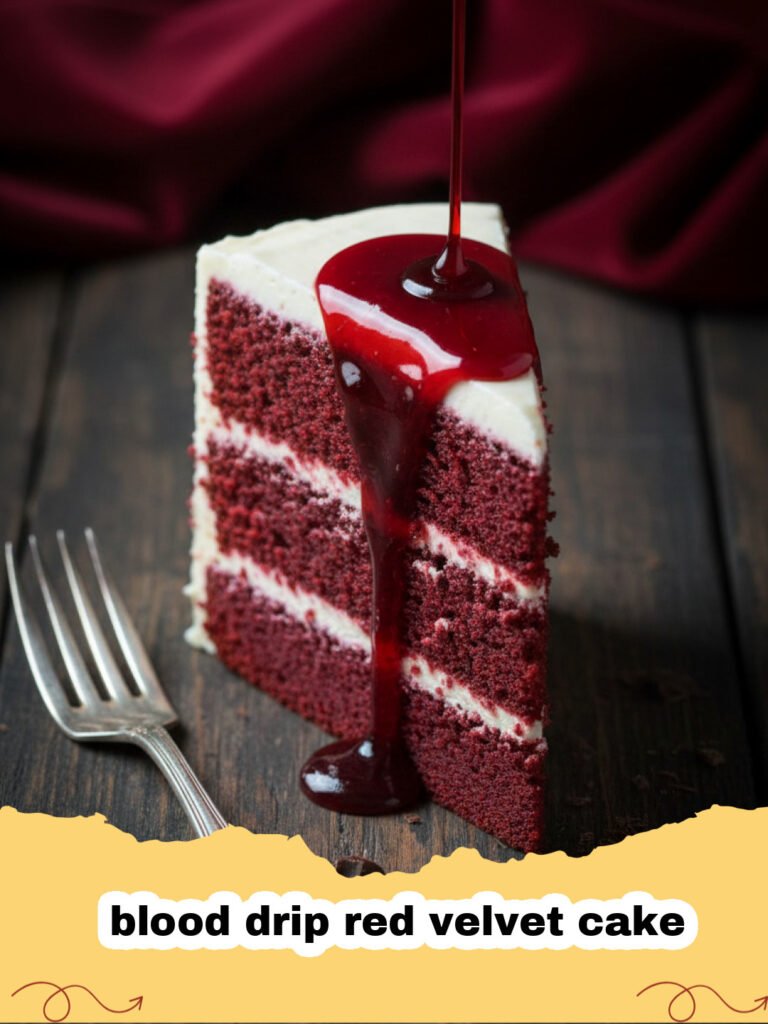
Creating a blood drip red velvet cake has become my favorite way to celebrate the spooky season with a touch of elegance and a lot of drama. I remember the first time I attempted this blood drip red velvet cake for a neighborhood Halloween potluck. I wanted something that looked like it belonged in a gothic novel—sophisticated yet slightly unsettling. As I drizzled the vibrant red ganache over the snow-white cream cheese frosting, I realized that the blood drip red velvet cake isn't just a dessert; it is a centerpiece that tells a story. The rich, cocoa-infused layers are the perfect canvas for the 'blood' to cascade down, creating a visual that guests can't stop talking about. Every slice reveals that iconic crimson crumb, making the blood drip red velvet cake a winner for both flavor and aesthetics. Whether you are hosting a haunted dinner or just want to treat your family to a macabre masterpiece, this blood drip red velvet cake is the ultimate recipe to keep in your repertoire.
Why This Recipe is a Must-Try
- Stunning Visual Impact: The contrast between the deep red 'blood' and the white frosting on this blood drip red velvet cake is truly breathtaking.
- Perfect Texture: Using buttermilk and vinegar ensures that your blood drip red velvet cake remains incredibly moist and tender.
- Balanced Flavors: The tang of the cream cheese frosting perfectly offsets the sweetness of the white chocolate ganache used for the blood drip red velvet cake.
- Versatile Theme: While perfect for Halloween, a blood drip red velvet cake can be adapted for vampire-themed parties or gothic weddings.
Key Ingredient Notes
To ensure your blood drip red velvet cake turns out perfectly every time, you need to pay attention to a few specific ingredients. First and foremost is the red food coloring. For a truly vibrant blood drip red velvet cake, I highly recommend using gel food coloring rather than liquid. Gel coloring is more concentrated and won't thin out your batter or ganache. Another essential is buttermilk. The acidity in buttermilk reacts with the baking soda to give the blood drip red velvet cake its signature lift and velvety crumb. If you find yourself with leftovers, storing them in high-quality Basics Glass Food Storage containers will keep the cake fresh for days without absorbing fridge odors.
Finally, let's talk about the 'blood' drip. This is made from a white chocolate ganache. Using high-quality white chocolate chips or a chopped bar is crucial for a smooth consistency in your blood drip red velvet cake. If the chocolate is too waxy, it might not emulsify correctly with the heavy cream, leading to a clumpy drip. If you're looking for more inspiration on dramatic desserts, you might also enjoy reading about How to Bake the Most Mysterious Phantom Red Velvet Cake.
Step-by-Step Guide with Pro Tips
Making a blood drip red velvet cake requires a bit of patience, but the results are well worth the effort. Follow these steps to ensure your cake is as delicious as it is haunting.
Preparing the Batter
Start by whisking your dry ingredients together. For a great blood drip red velvet cake, you want a fine cocoa powder that isn't too overpowering. In a separate bowl, cream the butter and sugar until light and fluffy. This aeration is key to the texture of the blood drip red velvet cake. Slowly incorporate the eggs and then alternate between adding the dry ingredients and the buttermilk. This method prevents the batter from curdling and ensures a smooth, uniform red color throughout your blood drip red velvet cake.
Baking and Cooling
Divide the batter into two or three 8-inch pans. Baking the blood drip red velvet cake at 350°F ensures even rising. Once baked, let the layers cool completely. A warm cake will melt the cream cheese frosting, ruining the structural integrity of your blood drip red velvet cake. Pro tip: wrap the cooled layers in plastic wrap and chill them in the freezer for 30 minutes before frosting. This makes them much easier to handle and minimizes crumbs.
The Frosting and Assembly
Whip up a thick cream cheese frosting. When assembling the blood drip red velvet cake, use a generous amount of frosting between the layers. Apply a 'crumb coat' first—a thin layer of frosting that seals in the crumbs. Chill the blood drip red velvet cake again before applying the final, smooth outer layer. A smooth surface is vital for the 'blood' to run down the sides of the blood drip red velvet cake evenly. For a complete Halloween spread, consider serving this alongside The Ultimate Fang Chocolate Dipped Strawberries for Halloween.
Creating the Blood Drip
Heat heavy cream until it just begins to simmer, then pour it over your white chocolate. Let it sit for a minute before stirring into a smooth ganache. Add your red gel coloring until you reach a deep, realistic 'blood' red. The temperature is everything here. If the ganache is too hot, it will run off the blood drip red velvet cake; if it is too cold, it won't drip at all. Test a small amount on the side of a glass before committing to the blood drip red velvet cake.
Variations & Serving Suggestions
While the classic blood drip red velvet cake is a showstopper, you can always put your own spin on it. For a more intense flavor, try adding a teaspoon of espresso powder to the cake batter; it enhances the cocoa without making the cake taste like coffee. If you want a different look for your blood drip red velvet cake, try a 'splatter' effect instead of a drip by dipping a stiff brush into the red ganache and flicking it at the white frosting.
When serving the blood drip red velvet cake, use a sharp knife dipped in hot water and wiped dry between each cut. This ensures clean, professional-looking slices that showcase the beautiful red layers. You can also garnish the base of the blood drip red velvet cake with crushed chocolate cookies to resemble 'dirt' or add edible silver leaf for a touch of gothic luxury. The blood drip red velvet cake also pairs beautifully with a glass of dark red wine or a rich cup of black coffee.
Nutrition Information
Understanding the nutritional profile of your blood drip red velvet cake helps in planning your festive treats. Below is an estimate per serving based on a 12-serving yield.
| Nutrient | Amount per Serving |
|---|---|
| Calories | 480 kcal |
| Carbohydrate Content | 62 g |
| Cholesterol Content | 75 mg |
| Fat Content | 24 g |
| Fiber Content | 1 g |
| Protein Content | 5 g |
| Saturated Fat Content | 14 g |
| Serving Size | 1 slice |
| Sodium Content | 320 mg |
| Sugar Content | 48 g |
| Trans Fat Content | 0.5 g |
| Unsaturated Fat Content | 8 g |
Conclusion
Mastering the blood drip red velvet cake is a rewarding experience for any home baker. It combines the technical skills of ganache making and smooth frosting with the creative fun of themed decorating. This blood drip red velvet cake is sure to be the star of any party, offering a delicious experience that is just as memorable as its appearance. I hope this guide inspires you to create your own blood drip red velvet cake and enjoy the thrill of a perfectly executed 'spooky' dessert. Happy baking, and may your blood drip red velvet cake be as delicious as it is terrifyingly beautiful!
FAQs
How do I make the 'blood' look realistic on the cake?
To make the blood look realistic on a blood drip red velvet cake, use a high-quality red gel food coloring. Mix it into a white chocolate ganache until you achieve a deep, crimson hue. The consistency of the ganache should be slightly thickened so it drips slowly rather than running off immediately.
Can I make this blood drip red velvet cake in advance?
Yes, you can bake the cake layers up to two days in advance. Keep them wrapped tightly in plastic wrap. You can also frost the cake a day early, but it's best to add the 'blood' drip on the day of serving for the freshest look.
What is the best way to store leftovers?
Leftover blood drip red velvet cake should be stored in the refrigerator due to the cream cheese frosting. Use an airtight container, like glass storage, to keep the moisture in and prevent the cake from drying out.
Blood Drip Red Velvet Cake
A stunning and delicious blood drip red velvet cake that combines velvety cocoa layers with a striking red white-chocolate ganache drip.
- Total Time: PT1H20M
- Yield: 12 servings 1x
Ingredients
2 1/2 cups all-purpose flour
1 1/2 cups granulated sugar
1 tsp baking soda
1 tsp salt
1 tsp cocoa powder
1 cup buttermilk, room temperature
2 large eggs, room temperature
1 1/2 cups vegetable oil
1 tsp white distilled vinegar
1 tsp vanilla extract
2 tbsp red food coloring gel
16 oz cream cheese, softened
1/2 cup unsalted butter, softened
4 cups powdered sugar
1/2 cup white chocolate chips
1/4 cup heavy cream
Extra red gel coloring for the drip
Instructions
Step 1: Preheat your oven to 350°F (175°C) and grease two 8-inch round cake pans.
Step 2: In a large bowl, sift together the flour, sugar, baking soda, salt, and cocoa powder.
Step 3: In another bowl, whisk together the buttermilk, eggs, oil, vinegar, vanilla, and red food coloring.
Step 4: Gradually add the dry ingredients to the wet ingredients, mixing until just combined and smooth.
Step 5: Divide the batter evenly between the prepared pans and bake for 30-35 minutes or until a toothpick comes out clean.
Step 6: While the cakes cool, beat the cream cheese and butter together, then gradually add powdered sugar to make the frosting.
Step 7: Frost the cooled cake layers with a crumb coat, chill for 30 minutes, and then apply a final smooth layer of frosting.
Step 8: Prepare the blood drip by melting white chocolate chips with heavy cream, then stir in red gel coloring.
Step 9: Carefully pour the red ganache around the edges of the cake to create the 'blood drip' effect, then fill in the top.
Step 10: Chill the cake for at least 1 hour before serving to set the drip.
Notes
Ensure the cake is completely chilled before adding the ganache drip to prevent melting.
- Prep Time: PT45M
- Cook Time: PT35M
- Category: Desserts & Baking
- Cuisine: American
Nutrition
- Serving Size: 1 slice
- Calories: 480 kcal
- Sugar: 48 g
- Sodium: 320 mg
- Fat: 24 g
- Saturated Fat: 14 g
- Unsaturated Fat: 8 g
- Trans Fat: 0.5 g
- Carbohydrates: 62 g
- Fiber: 1 g
- Protein: 5 g
- Cholesterol: 75 mg
Leave a Reply