

The first time I encountered a true banana pepper recipe, it wasn't in a fancy cookbook or a gourmet restaurant. It was in my Grandma Rose's sun-drenched kitchen, a place where magic happened with humble ingredients. I must have been about eight years old, watching her deftly slice vibrant yellow peppers, their sweet-tangy aroma filling the air. She'd always have a mountain of them from her garden, a testament to her green thumb, and her method for preserving them was legendary. She'd say, "These aren't just peppers, honey, they're sunshine in a jar, ready for a rainy day," her eyes twinkling with a secret only grandmas seem to possess. I remember the anticipation as those freshly filled jars cooled on the counter, the hot liquid slowly turning clear, the bright peppers softening ever so slightly under the spell of the brine. That very first bite of her homemade pickled banana pepper was an explosion of sweet, tangy, and a mere whisper of spice – a taste that instantly transported me back to those endless summer days. It wasn't just food; it was a memory, a feeling, a tradition. Her banana pepper recipe became a staple at every family gathering, tucked into towering deli sandwiches, crumbled over crisp green salads, or simply eaten straight from the jar as a zesty, irresistible snack. This particular banana pepper recipe isn't just about pickling; it’s about continuing a beloved tradition, preserving summer's vibrant flavors, and bringing a little bit of that cherished childhood sunshine into your very own home, ready to brighten any meal or moment.
Why This Banana Pepper Recipe is a Must-Try
- Garden Freshness Preserved, Effortlessly: Imagine savoring the crisp, tangy flavor of freshly picked banana peppers long after the growing season has ended. This banana pepper recipe is an absolute marvel for capturing the peak flavor of your garden's bounty, allowing you to enjoy summer's vibrant produce all year long. It’s a wonderful way to utilize a surplus of peppers, transforming them into a versatile condiment that brightens up any dish. Forget wilted peppers; this recipe ensures their lively character shines through, making it a sustainable and delicious choice.
- Incredibly Versatile & Flavor-Packed: The beauty of this pickled banana pepper recipe lies in its adaptability. These sweet and tangy peppers are far from a one-trick pony. They elevate almost any dish they grace, from adding a zesty crunch to a hearty sub sandwich to bringing a bright counterpoint to a rich, cheesy pizza. Think beyond the obvious: chop them into salads for an unexpected pop, layer them into quesadillas, or even serve them on a charcuterie board for a delightful burst of tang. It’s truly adaptable and will quickly become a pantry staple for its ability to enhance a myriad of meals.
- Surprisingly Simple & Quick to Prepare: Don't be intimidated by the idea of pickling! This quick-pickle banana pepper recipe requires no complex canning equipment or extensive experience. You can have jars of deliciousness ready to chill in under 30 minutes of active preparation time. It’s a fantastic entry point into the world of home preservation, offering instant gratification with minimal fuss. The simple steps and readily available ingredients make this an accessible and rewarding banana pepper recipe for cooks of all skill levels, delivering gourmet results without the gourmet effort.
- Customizable to Your Heart's Content: One of the most enjoyable aspects of making your own pickled goods is the freedom to tailor the flavors precisely to your palate. This banana pepper recipe serves as a perfect blank canvas. Do you prefer a sweeter pickle? Add a little more sugar. Craving extra tang? Increase the vinegar slightly. Want to dial up the heat? A few red pepper flakes or a hotter pepper can do the trick. You have complete control over the balance of sweet, sour, and spicy, allowing you to craft what will undoubtedly become your personal best banana pepper recipe, perfectly suited to your family's tastes.
Key Ingredient Notes for Your Banana Pepper Recipe
While this banana pepper recipe is delightfully straightforward, paying attention to the quality and type of a few key ingredients will undoubtedly elevate your final product and ensure every jar is a resounding success.
Fresh Banana Peppers
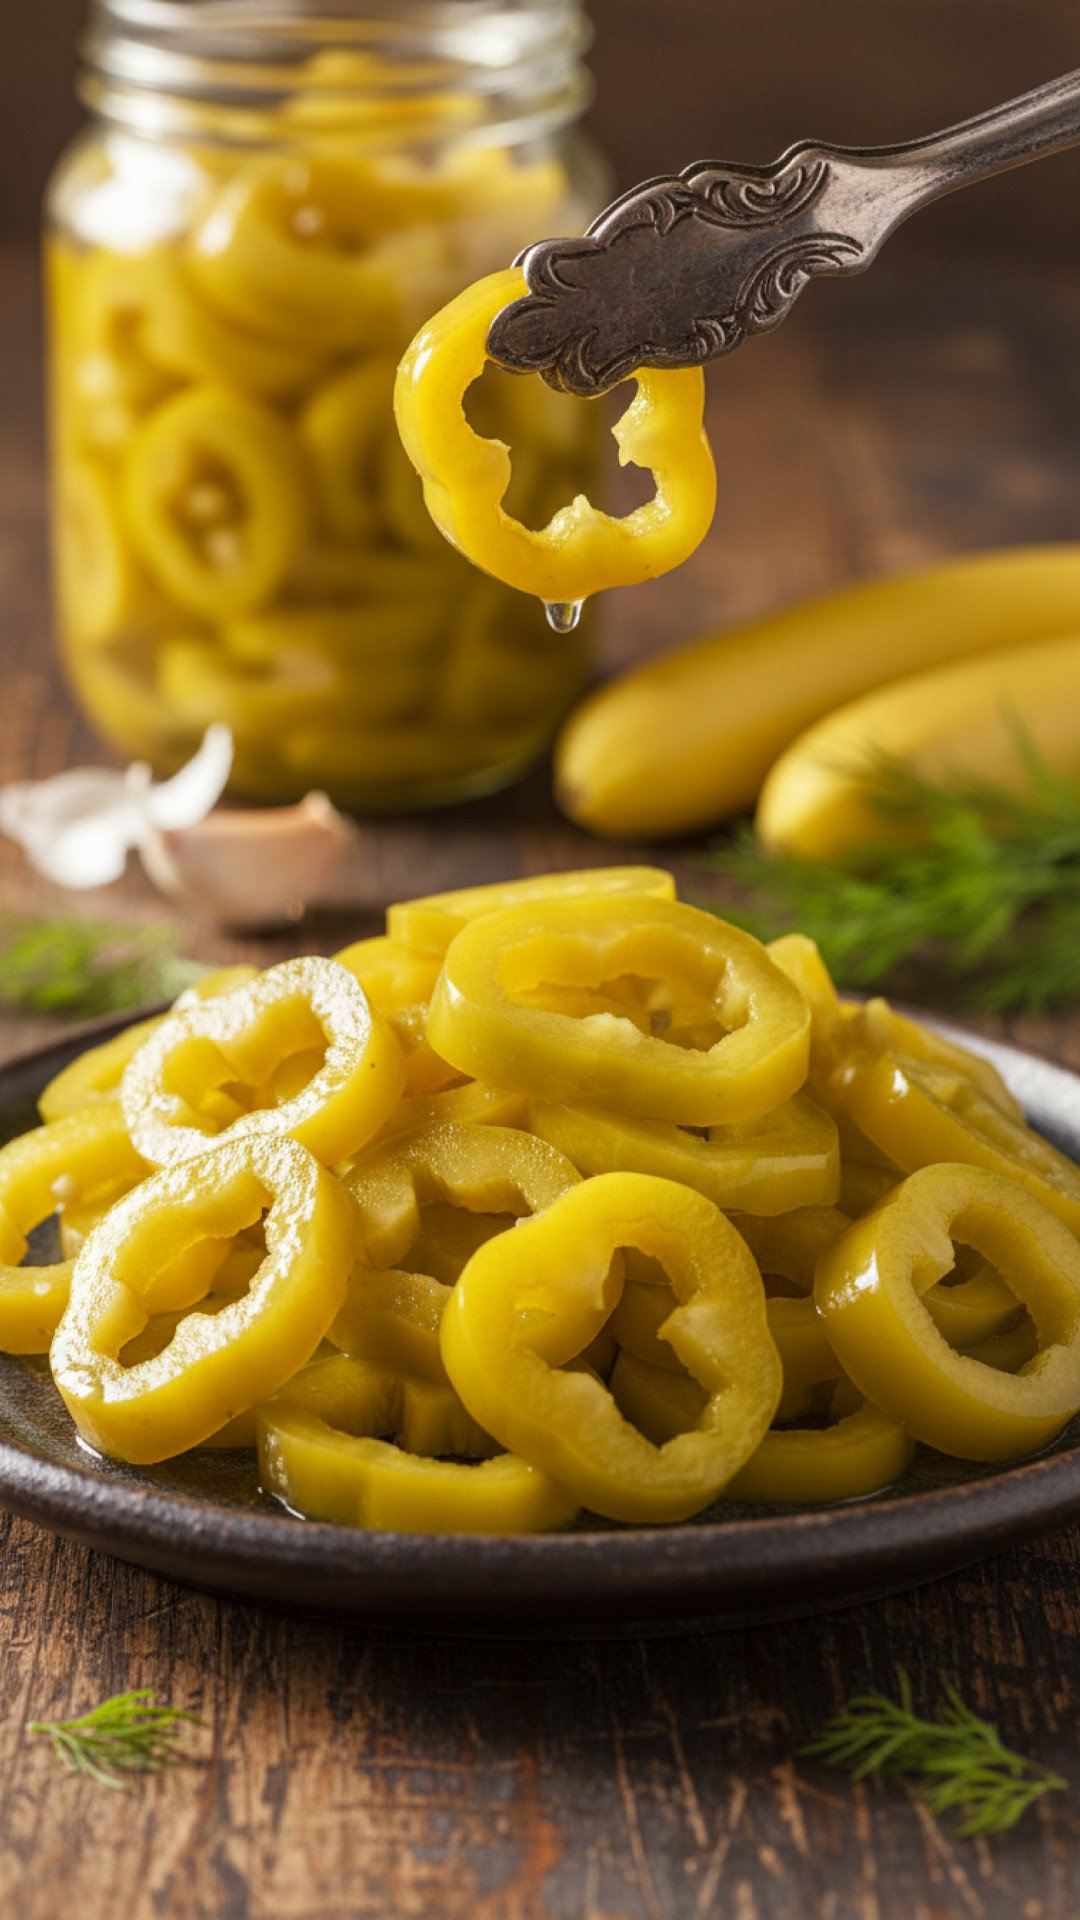
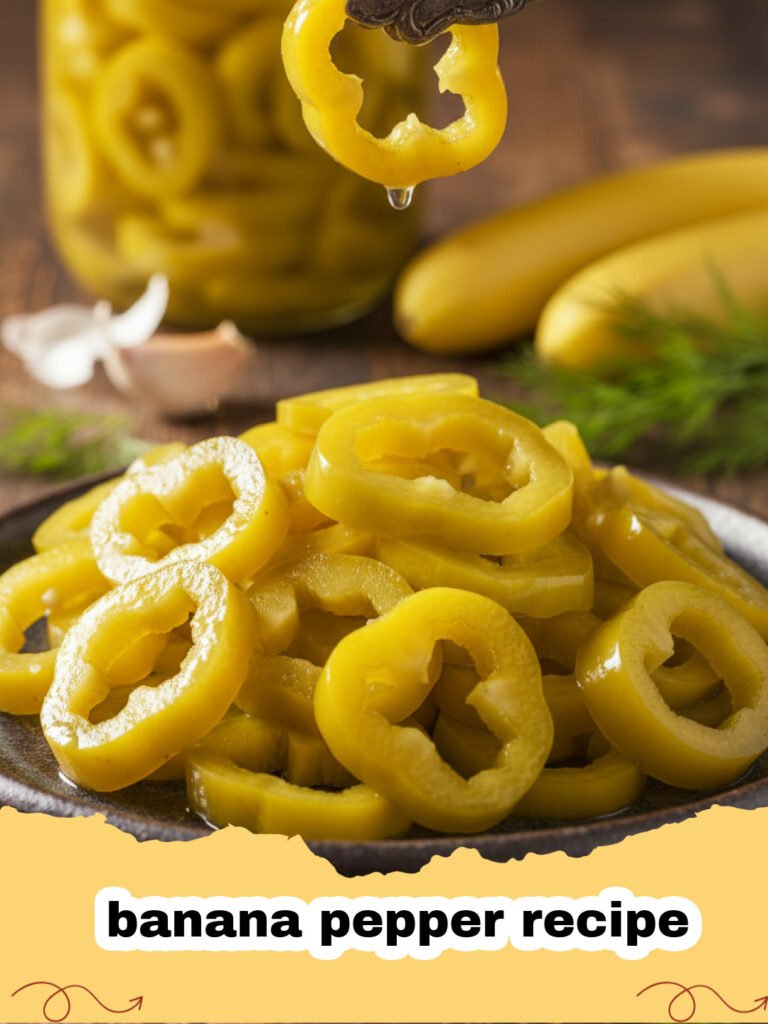
The undisputed star of our banana pepper recipe! When selecting your peppers, look for those that are firm to the touch, vibrantly yellow, and free from any soft spots, blemishes, or shriveled areas. A healthy, fresh pepper will yield a crisper, more visually appealing pickle. While green banana peppers can certainly be used, the classic sweet and tangy flavor, along with the bright, cheerful color that makes this recipe so iconic, comes from the mature yellow varieties. If you're growing your own, pick them when they reach their full color. Freshness is paramount to achieving that desirable crisp-tender texture in your homemade pickled peppers.
White Vinegar
This is the workhorse of your pickling brine, providing the essential tang and acting as the primary preserving agent in our banana pepper recipe. For a clean, sharp, and traditional pickled flavor, use distilled white vinegar. Its neutral taste allows the pepper's natural sweetness and subtle heat to shine through. While apple cider vinegar can be used for a slightly mellower, fruitier note, it will impart a different flavor profile and color to your finished product. Stick with white vinegar for the authentic, zesty taste this recipe aims for. Ensure it has at least 5% acidity for proper preservation.
Pickling Salt (or Kosher Salt)
This might seem like a minor detail, but using the correct salt is crucial for a successful banana pepper recipe. It's imperative to use pickling salt or a pure kosher salt that explicitly states it does not contain anti-caking agents or iodine. Regular table salt often contains these additives, which can cause your pickling brine to become cloudy and can even affect the texture of your peppers, making them soft rather than crisp. Pickling salt dissolves easily and provides the pure salinity needed for preservation and flavor development. A good banana pepper recipe relies on the right salt to achieve that perfect brine.
Step-by-Step Guide with Pro Tips for Your Banana Pepper Recipe
Embarking on the journey to make your own delicious pickled banana peppers is incredibly rewarding. Follow these detailed steps, complete with pro tips, and this banana pepper recipe will guide you to success!
- Step 1: Prepare Your Peppers. Begin by washing your banana peppers thoroughly under cold running water. It's important to remove any dirt or debris from the peppers, especially if they are fresh from the garden. Pat them dry completely with a clean kitchen towel or allow them to air dry. This ensures no excess water dilutes your brine.
- Step 2: Slice the Peppers. Using a sharp knife, slice the banana peppers into uniform ¼ to ½ inch rounds. Consistency in thickness allows for even pickling. You have a choice here: for a milder pickle, you can carefully remove the seeds from the pepper rings before packing. If you prefer a slightly spicier kick, leaving some or all of the seeds in will add a subtle warmth to your banana pepper recipe.
- Step 3: Sterilize Your Jars. While this is a quick-pickle banana pepper recipe and not a traditional long-term canning method requiring full pressure sterilization, it's still best practice to prepare your pint-sized glass jars and their lids. Wash them thoroughly with hot, soapy water and rinse very well. For an extra layer of cleanliness, you can even run them through a quick dishwasher cycle on a hot setting. Ensuring your jars are clean helps prevent spoilage and keeps your pickled banana peppers safe and delicious. Remember, good quality glass food storage jars are essential for proper storage and display of this beautiful banana pepper recipe.
- Step 4: Prepare the Brine. In a medium-sized, non-reactive saucepan (stainless steel or enamel are ideal), combine the water, white vinegar, sugar, and pickling salt. Place the saucepan over medium-high heat and bring the mixture to a rolling boil, stirring constantly until the sugar and salt are fully dissolved. This hot, flavorful liquid is the heart of your banana pepper recipe and what will infuse your peppers with their signature tang. Taste it and adjust sweetness/saltiness if you like, keeping in mind the peppers will absorb a lot.
- Step 5: Pack the Jars. While the brine is heating, evenly distribute the sliced garlic cloves (usually 1-2 cloves per pint jar, sliced for maximum flavor release) and any pickling spices you’re using (such as whole mustard seeds, dill seeds, or peppercorns) among your prepared jars. Then, tightly pack the sliced banana peppers into the jars, leaving about ½ inch of headspace from the rim. Pack them as snugly as you can without crushing them; this ensures they remain submerged in the brine and absorb all that wonderful flavor from this banana pepper recipe.
- Step 6: Pour the Brine. Carefully pour the hot pickling brine over the packed banana peppers in each jar, ensuring that the peppers are fully submerged. It’s crucial to maintain the ½ inch headspace from the top of the jar, as this allows for proper sealing and prevents overflow. Gently tap the jars on the counter a few times to release any trapped air bubbles. If the brine level drops, top it off.
- Step 7: Seal the Jars. Wipe the rims of the jars clean with a damp cloth – any residue could prevent a proper seal. Place the lids on top, and then screw the rings on until they are finger-tight (not overly tight). This quick-pickle banana pepper recipe doesn't require a water bath for immediate refrigeration, but a good seal will keep them fresh.
- Step 8: Cool and Chill. Allow the jars to cool completely to room temperature on your kitchen counter. This can take several hours. Once they are no longer warm to the touch, transfer them to the refrigerator. The cooling process is part of the magic of this banana pepper recipe.
- Step 9: The Waiting Game. For the absolute best flavor, let your homemade pickled banana peppers chill in the refrigerator for at least 24-48 hours before indulging. This crucial waiting period allows the flavors to meld beautifully and the peppers to fully absorb the tangy brine. Trust us, this banana pepper recipe only gets better with a little patience!
Variations & Serving Suggestions for Your Banana Pepper Recipe
This classic banana pepper recipe provides a fantastic foundation, but don't be afraid to experiment and make it your own! Here are some creative variations and delicious serving ideas to inspire you:
- Amp Up the Heat: For those who crave a fiery kick, adding more spice is simple. Tuck a few thin slices of hotter peppers like jalapeños or serranos into each jar along with the banana peppers. Alternatively, a pinch or two of red pepper flakes added directly to the brine will infuse every bite with a pleasant warmth. This variation on the banana pepper recipe is perfect for spice lovers!
- Herbaceous Infusions: Introduce fresh herbs for an aromatic twist. A small sprig of fresh dill, a bay leaf, or even a few sprigs of fresh oregano can be added to each jar before pouring in the brine. These herbs will subtly perfume the peppers, adding depth and complexity to your banana pepper recipe.
- Sweet & Sour Adjustments: The beauty of a homemade banana pepper recipe is complete control over the flavor profile. If you prefer a sweeter pickle, increase the sugar slightly. For an extra puckering tang, a touch more white vinegar in the brine will do the trick. Experiment in small increments until you find your perfect balance.
- Garlic Lover's Delight: If you're a true garlic enthusiast, don't hesitate to add a few extra cloves of sliced garlic to each jar. The garlic flavor will intensify as the peppers pickle, adding a robust, pungent note that complements the peppers beautifully in this banana pepper recipe.
- Serving Suggestions: These quick-pickled banana peppers are incredibly versatile.
- Sandwich & Burger Superstar: Pile them high on classic deli sandwiches, juicy grilled burgers, or hearty sub rolls for a burst of zesty crunch.
- Salad & Side Kick: Chop them up and toss them into tuna salad, chicken salad, or egg salad for an exciting tang. They're also a fantastic addition to green salads or pasta salads.
- Pizza & Taco Topping: Garnish homemade pizzas, loaded nachos, or flavorful tacos with these tangy slices for an extra layer of flavor and texture.
- Snack Attack: Don't underestimate the simple pleasure of eating them straight from the jar as a refreshing, low-calorie snack.
- Charcuterie Board Essential: Add a small bowl of these vibrant pickles to your next charcuterie or cheese board for a bright counterpoint to rich cheeses and cured meats.
- For a heartier meal that truly celebrates the banana pepper, consider exploring our recipe for The Best Cheesy Italian Sausage Banana Pepper Recipe for Your Family Table. It's a fantastic way to incorporate these peppers into a main course.
- If you enjoy cooking with peppers and want to explore another delicious preparation, you might also love our guide for The Ultimate Stuffed Banana Pepper Recipe: A Family Favorite.
Nutrition Information
| Nutrient | Amount per serving |
|---|---|
| Calories | 25 kcal |
| CarbohydrateContent | 5g |
| CholesterolContent | 0mg |
| FatContent | 0g |
| FiberContent | 1g |
| ProteinContent | 1g |
| SaturatedFatContent | 0g |
| ServingSize | 1/4 cup |
| SodiumContent | 250mg |
| SugarContent | 4g |
| TransFatContent | 0g |
| UnsaturatedFatContent | 0g |
Conclusion
There's something incredibly satisfying and truly special about making your own pickled delights, and this homemade banana pepper recipe is undoubtedly one of the easiest, most rewarding, and utterly delicious recipes you can add to your culinary repertoire. Whether you’re a seasoned pickler looking for a quick and reliable method, or a first-timer eager to dive into the world of home preservation, this quick and zesty banana pepper recipe will transform simple garden peppers into a versatile pantry staple you'll soon wonder how you ever lived without. The bright, tangy flavor and satisfying crunch of these pickled peppers are unmatched by store-bought versions. So go ahead, gather some fresh banana peppers, embrace the joy of creating something wonderful from scratch, and bring a little bit of that preserved sunshine into your kitchen. You and your taste buds will be so glad you did. Enjoy your homemade pickled banana peppers!
FAQs
What kind of banana peppers should I use for this banana pepper recipe?
For the best banana pepper recipe results, use fresh, firm, and vibrant yellow banana peppers. While green ones can be used, the classic color and milder, sweeter flavor come from the mature yellow varieties. Avoid peppers that are soft or shriveled.
How long do homemade pickled banana peppers last?
When properly prepared and stored in sterilized jars in the refrigerator, this banana pepper recipe will keep your quick-pickled peppers fresh for up to 2-3 months. This is a quick-pickle method; for longer-term, shelf-stable storage, traditional water bath canning techniques would be required.
Can I make this banana pepper recipe spicier?
Absolutely! To add more heat to your banana pepper recipe, you can include a few slices of hotter peppers like jalapeu00f1os or serranos in each jar, or add a pinch of red pepper flakes (1/4 to 1/2 tsp) to the brine mixture during cooking.
What can I use pickled banana peppers for?
Pickled banana peppers from this banana pepper recipe are incredibly versatile! They're fantastic on sandwiches, subs, and burgers, a tangy addition to salads, pizzas, or even as a flavorful topping for tacos and nachos. Many people also enjoy them straight from the jar as a zesty snack, or as part of a charcuterie board.
Quick & Zesty Pickled Banana Pepper Recipe
An easy-to-follow, quick-pickle banana pepper recipe for homemade pickled banana peppers that are sweet, tangy, and mildly spicy. Perfect for sandwiches, salads, or as a standalone snack.
- Total Time: 25 minutes
- Yield: 2 pint jars 1x
Ingredients
1.5 lbs fresh banana peppers
2 cups white vinegar (5% acidity)
2 cups water
1/2 cup granulated sugar
2 tbsp pickling salt (or kosher salt without anti-caking agents)
4-6 cloves garlic, thinly sliced
Optional: 1 tsp pickling spice blend (per pint jar)
Optional: red pepper flakes for heat
Instructions
Step 1: Prepare Your Peppers. Begin by washing your banana peppers thoroughly under cold running water. Pat them dry completely with a clean kitchen towel or allow them to air dry.
Step 2: Slice the Peppers. Using a sharp knife, slice the banana peppers into uniform ¼ to ½ inch rounds. You can remove the seeds for a milder pickle, or leave them in for a slightly spicier kick.
Step 3: Sterilize Your Jars. Wash your pint-sized glass jars and their lids thoroughly with hot, soapy water and rinse very well. You can also run them through a quick dishwasher cycle on a hot setting.
Step 4: Prepare the Brine. In a medium-sized, non-reactive saucepan, combine the water, white vinegar, sugar, and pickling salt. Bring the mixture to a rolling boil over medium-high heat, stirring constantly until the sugar and salt are fully dissolved.
Step 5: Pack the Jars. While the brine is heating, evenly distribute the sliced garlic cloves and any optional pickling spices among your prepared jars. Then, tightly pack the sliced banana peppers into the jars, leaving about ½ inch of headspace from the rim.
Step 6: Pour the Brine. Carefully pour the hot pickling brine over the packed banana peppers in each jar, ensuring the peppers are fully submerged. Maintain the ½ inch headspace. Tap the jars gently on the counter to release any trapped air bubbles.
Step 7: Seal the Jars. Wipe the rims of the jars clean with a damp cloth, then place the lids and rings on until they are finger-tight.
Step 8: Cool and Chill. Allow the jars to cool completely to room temperature on your counter. Once cool, transfer them to the refrigerator.
Step 9: The Waiting Game. For the best flavor, let your homemade pickled banana peppers chill in the refrigerator for at least 24-48 hours before enjoying. This allows the flavors to meld beautifully.
Notes
For crisper peppers, you can add 1/2 tsp of pickling crisp (calcium chloride) to each pint jar. Ensure jars are always kept refrigerated after initial cooling. This recipe is for quick pickles and is not suitable for long-term shelf-stable canning unless proper water bath canning methods are followed.
- Prep Time: 15 minutes
- Cook Time: 10 minutes
- Category: Drinks, Snacks & Holiday Treats
- Cuisine: American
Nutrition
- Serving Size: 1/4 cup
- Calories: 25 kcal
- Sugar: 4g
- Sodium: 250mg
- Fat: 0g
- Saturated Fat: 0g
- Unsaturated Fat: 0g
- Trans Fat: 0g
- Carbohydrates: 5g
- Fiber: 1g
- Protein: 1g
- Cholesterol: 0mg
Leave a Reply